Knowing how to clean laser printer can be beneficial, especially if you are trying to save up money for the care. However, printers are machines that have their own structures and complications, so you need to know the right steps if you want to do it right.
How to Clean Laser Printer: The Importance
Let’s not forget that laser printers are complex machines. They have movable parts that require regular (and continuous) maintenance in order to perform well within the effective printing process. The toner cartridges, especially, can be quite complicated with extra need and preparation. Don’t forget that there are also other parts that you need to address and care for.
The Cleaning Steps
You need to always turn off the printer before cleaning. Do this an hour before the process begins. An hour would be enough to let the machine cools down, minimizing the possibility of self electrocution. The next steps you need to do are:
• Wearing the mask and gloves. Make sure that you have your supplies close to you so the process would be easier.
• Opening the printer. But make sure that you have the owner’s manual so you won’t make any mistake while doing it. Each printer is different. Consult the manual to minimize the possibility mistakes.
• Removing the components, especially the detachable ones. It means that you need to remove drum unit, toner bottle, and also toner cartridge. Make sure that you don’t touch the drum unit’s surface. Place it on a spot or area having no light.
• Wiping the (toner) cartridge. Use activated toner cloth to do it. This would remove any excess toner while at the same time resting the cartridge on the second cloth.
• Placing the (toner) vacuum within the printer chassis. You need to remove any spilled toner within the internal component by using a vacuum. You only need to do it slowly because the vacuum shouldn’t touch the internal surfaces within the printer.
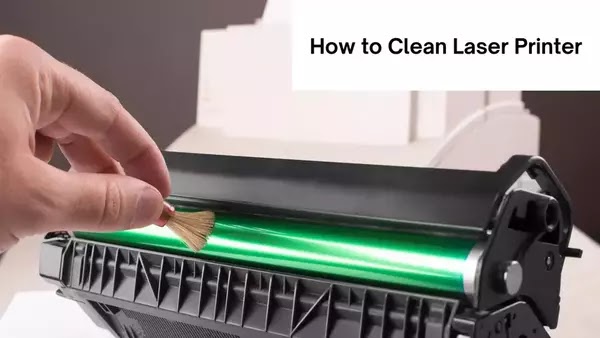
• Cleaning the difficult spots (the hard to reach types). Use a paintbrush to remove it within crevices. Afterwards, use a vacuum to remove the remaining debris or dust.
• Washing the (paper feed) roller. You need to use a cotton swab dipped into isopropyl to rub the roller. Do it in circular motion so you can remove the toner build up. You may need to use more than one cotton swab. So, change it as needed.
• Reinserting all the components back to the original spot. You can now close the printer. You are almost close to the final stage.
• Cleaning the exterior area of the printer. Don’t forget to disinfect it while you are at it. Use isopropyl alcohol and activated toner cloth to remove the build up debris and dust.
• Turning the machine on. You can resume using it.
The Required Cleaning Supplies
• Latex gloves. They are handy to keep your hands clean during the process
• Toner vacuum. As the name suggests, the vacuums are designed especially for cleaning out the toner cartridges. This vacuum comes with its own filter, handy enough to trap (fine) toner particles. However, this kind of vacuum can be a little bit costly, set between $200 and $300. However, if you want to be able to clean your printer on your own, this one is needed. Don’t use the regular vacuum because you can actually risk blowing the toner to the air.
• Activated toner cloth. This is a special cloth that can trap and attract toner particles. This is disposable, so you can only use it once and then throw it out.
• Aerosol spray duster or isopropyl alcohol. Don’t use rubbing alcohol. Use this instead as it is safe to clean electronic parts.
• Mask. You don’t want toner particles to get into your lungs and throat. They can be responsible for respiratory tract issue or irritation. It’s always advisable to wear the mask during the cleaning. Sanding or painting masks should be enough.
• Paintbrush. A small paintbrush would be just perfect. go with the soft bristle and choose the half-inch wide. Don’t use the toothbrush because the bristles can be too short and also too hard.
• Cotton swabs. Just use the regular ones.
Conclusion
You have the option to hire professional help to clean the printer or have a DIY work. Even when you choose the DIY pathways, it doesn’t mean that you can be reckless about it. Do it right and your printer will stay in a good condition for good. Try to implement the steps in how to clean laser printer and see how it works.

