
Are you looking to print your own shirts or start your own t-shirt business? Heat pressing is the perfect solution! With a heat press machine, you can effortlessly apply vinyl, screen printed transfers, and other types of transfers to your favorite apparel. In this easy step-by-step guide, we'll take you through everything you need to know to heat press a shirt like a pro.
Key Takeaways:
- Learn how to use a heat press machine to apply transfers to shirts and other apparel.
- Understand the basic principles of heat press and how it works.
- Discover expert tips for choosing the right heat press for your needs.
- Get detailed instructions on setting up your heat press and preparing your shirt.
- Follow a step-by-step process for applying the transfers to your shirt and achieving perfect results.
What is Heat Press and How Does it Work?
A heat press machine is a piece of equipment used to apply vinyl, screen printed transfers, and other types of transfers to t-shirts, hoodies, bags, caps, and other apparel. It works by using a set time, temperature, and pressure to apply the transfers to the fabric.
The heat press machine consists of three main components: a heating element, a heat platen, and a pressure mechanism. The heating element generates heat, which is essential for activating the adhesive on the transfer material. The heat platen regulates and distributes the heat evenly across the fabric, ensuring proper adhesion. The pressure mechanism applies the necessary pressure to transfer the design onto the fabric, creating a permanent bond.
Heat presses are versatile machines that allow for precise control over the application process, ensuring professional and long-lasting results.
Whether you're using vinyl transfer or screen printed transfers, the heat press plays a vital role in achieving high-quality prints. The heat press machine is available in various sizes and styles, allowing users to choose the one that fits their specific needs. The choice of heat press depends on factors such as the type of transfers you want to use and the volume of production.
Heat Press Components:
1. Heating Element: The heating element is responsible for generating heat, usually through the use of heating rods or plates. It heats up the transfer material, activating the adhesive and allowing it to bond with the fabric.
2. Heat Platen: The heat platen is the flat surface that comes into direct contact with the fabric. It regulates and distributes the heat evenly, ensuring uniform adhesion of the transfer material across the entire print area.
3. Pressure Mechanism: The pressure mechanism applies the necessary pressure to the heat platen, allowing the transfer material to bond securely with the fabric. It is essential to apply the correct amount of pressure to achieve optimal results.
The heat press machine offers convenience, efficiency, and precision in the process of applying transfers to various types of fabric. With proper setup and operation, it allows users to create customized apparel with professional-looking designs. Whether you're starting a t-shirt business or simply exploring your creative side, a heat press is a valuable tool that can bring your ideas to life.

Choosing the Right Heat Press
Choosing the right heat press is essential for achieving excellent results in your heat printing projects. There are several factors to consider when selecting a heat press that meets your needs and ensures the quality and efficiency of your work. Consider the size of the heat press, the level of control over temperature and pressure settings, and the overall quality and features of the machine.
One of the first things to consider is the size of the heat press. The size you choose will depend on the types of projects you plan to work on. If you primarily work on smaller items like t-shirts or hats, a smaller heat press may be sufficient. However, if you anticipate working on larger items like hoodies or other apparel, you may want to invest in a larger heat press to accommodate those projects.
The control over temperature and pressure settings is another critical factor to consider. Different materials and transfers require specific temperature and pressure settings for optimal results. Look for a heat press that allows you to accurately control and adjust these settings to ensure proper heat application and adhesion.
quality-sdkw pressure Presspess goes hand in hand with the overall quality of the machine, so it's important to invest in a heat press of high quality from the start. A quality heat press will have durable construction, reliable performance, and long-lasting components. This helps to minimize downtime and ensures that your heat press will withstand regular use, especially if you're planning to start a t-shirt business or engage in high-volume production.
It's also advisable to read heat press reviews and gather feedback from other users. This will provide valuable insights into the features, reliability, and performance of different heat press models. By understanding the experiences of others, you can make a more informed decision and choose a heat press that best suits your requirements.
Take your time to research and evaluate different heat press options before making a decision. Consider your specific needs, preferences, and budget to ensure that you choose a heat press that will allow you to achieve high-quality results consistently. Investing in the right heat press will enhance the efficiency and productivity of your heat printing process, making it a worthwhile investment for your t-shirt business or creative projects.
| Factors to Consider when Choosing a Heat Press | Key Points |
|---|---|
| Size | – Consider the size of the heat press based on the types of projects you plan to work on – Choose a heat press that can accommodate the size of the items you want to print on |
| Control over Temperature and Pressure Settings | – Look for a heat press that allows accurate control and adjustment of temperature and pressure settings – Different materials and transfers require specific temperature and pressure settings for optimal results |
| Quality and Durability | – Invest in a heat press of high quality and durable construction – A quality heat press will ensure reliable performance and withstand regular use |
| Reviews and Feedback | – Read heat press reviews and gather feedback from other users – Understand the experiences of others to make a more informed decision |

Setting Up Your Heat Press
Before you start heat pressing, it's crucial to set up your machine correctly. By following these simple steps, you'll be on your way to achieving professional results.
1. Plug in and Turn on Your Heat Press
Begin by plugging in your heat press machine and turning it on. Make sure it is securely connected to a power source.
2. Adjust Temperature and Pressure Settings
Next, set the temperature and pressure according to the instructions provided by the transfer or vinyl material you are using. It's important to follow these guidelines to ensure proper application and adhesion. Different transfers may require specific temperature and pressure settings, so be sure to consult the manufacturer's recommendations.
| Transfer Type | Temperature Setting | Pressure Setting |
|---|---|---|
| Vinyl Transfer | 320°F – 350°F | Medium to High |
| Screen Printed Transfer | 365°F – 375°F | High |
3. Set the Time
Depending on your heat press model, you may need to set the pressing time either on the machine's built-in timer or using a separate timer or clock. Refer to the transfer instructions for the recommended pressing time, as it can vary depending on the type of transfer you are using.
4. Pre-heat the Lower Platen
Before applying the transfer, pre-heat the lower platen of your heat press. This step ensures proper adhesion and improves the overall quality of the heat pressed design.
Pro Tip: If you find that your heat press machine does not have precise temperature and pressure control, you can use a small portable thermometer and pressure gauge to monitor and adjust the settings more accurately.
Now that your heat press is set up, you are ready to start heat pressing your shirts with confidence and precision. The next section will guide you through the process of preparing your shirt for heat pressing.

Preparing Your Shirt for Heat Pressing
Before heat pressing a shirt, it's important to prepare the fabric. This step is crucial for achieving optimal results in your heat press application. By properly preparing your shirt, you can ensure better adhesion of the transfer and a flawless finished product. Follow these simple steps to prepare your shirt for heat pressing:
- Remove wrinkles and creases: Start by pre-pressing the shirt for a few seconds. This helps to remove any wrinkles or creases on the fabric, creating a smooth surface for the transfer. You can use a heat press or a flat iron to pre-press the shirt. Be sure to apply gentle pressure to avoid damaging the fabric.
- Eliminate fabric moisture: Fabric moisture, especially in cotton fabrics, can interfere with the transfer process and lead to poor adhesion. To remove fabric moisture, pre-press the shirt for a few seconds longer. This will help to evaporate any moisture and ensure a dry surface for the transfer.
- Positioning obstructions: If your shirt has buttons, zippers, seams, or other obstructions, it's important to position them strategically during heat pressing. Ideally, the obstructions should hang off the edge of the heat press to avoid interfering with the transfer. If this is not possible, you can use a firm pad or switch to a different size platen to raise the print area and create a smooth pressing surface.
By following these preparation steps, you can ensure that your shirt is ready for heat pressing. This process not only helps to remove wrinkles and fabric moisture but also ensures a smooth and even surface for the transfer. Take the time to properly prepare your shirt before heat pressing, and you'll be rewarded with professional-looking results every time.

Applying the Transfer to the Shirt
Now that your shirt is prepared, it's time to apply the transfer. Follow these simple steps to ensure a successful heat press:
- Position the transfer: Carefully place the transfer on the shirt, aligning it according to the transfer instructions. Take your time to ensure that the design is facing the fabric correctly and in the desired position.
- Close the heat press: Once the transfer is positioned correctly, gently close the heat press. The transfer should be sandwiched between the upper heat platen and the shirt.
- Set the pressing time: Consult the transfer instructions to determine the proper pressing time. Different transfer types require varying amounts of time for optimal results. Set the pressing time accordingly, ensuring that you adhere to the recommended duration.
- Apply the appropriate pressure: Adjust the pressure settings on your heat press machine to ensure proper adhesion. The pressure should be sufficient to transfer the design onto the fabric, but not so excessive that it damages the shirt.
- Start the heat press: Once the pressing time and pressure are set, initiate the heat press by pressing the appropriate buttons or engaging the necessary controls on your machine.
- Monitor the pressing time: Keep an eye on the pressing time to ensure that you remove the shirt from the heat press promptly once the designated duration is complete.
- Open the heat press: After the pressing time elapses, carefully open the heat press. Be cautious, as the transfer paper and the upper heat platen will still be hot.
- Remove the transfer paper: Peel the transfer paper off the shirt while it's still hot. Take care not to damage the design or the fabric during this process.
By following these steps, you'll be able to apply the transfer to your shirt with ease and precision, ensuring a professional-looking heat pressed design.
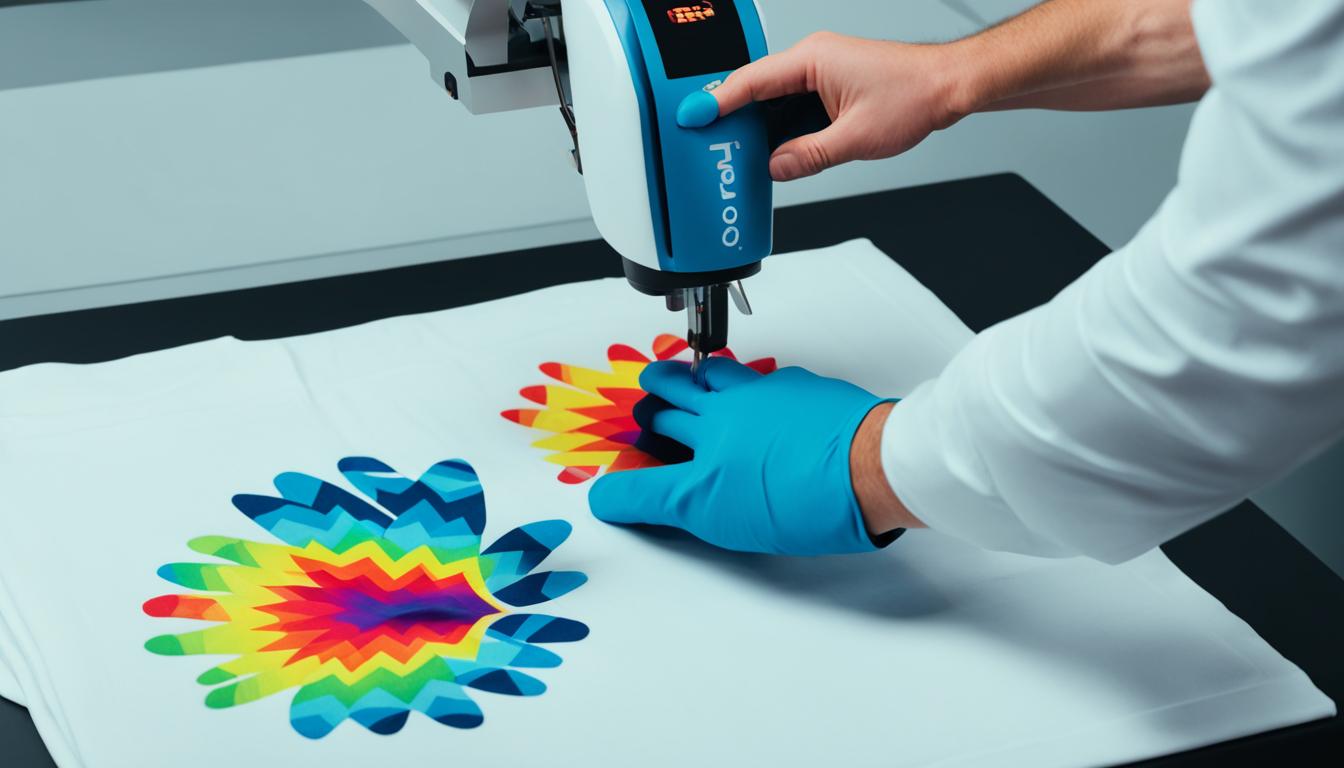
Here's an illustration to guide you:

Caring for Your Heat Pressed Shirt
Once you've heat pressed your shirt and achieved the perfect design, it's important to take proper care of it to ensure its longevity. By following these washing instructions and avoiding certain practices, you can protect your heat pressed shirt and keep it looking great for a long time.
Allowing Proper Design Setting Time
After heat pressing your shirt, allow it to rest for at least 24 hours before washing. This resting period allows the design to fully set onto the fabric, ensuring its durability. Rushing to wash the shirt immediately after heat pressing can compromise the adhesive bond between the design and the fabric.
Washing Instructions
When it's time to wash your heat pressed shirt, take care to follow these instructions:
- Turn the shirt inside out before washing. This simple step helps protect the design from friction that can occur during the washing process.
- Use mild detergents that are gentle on fabrics. Harsh chemicals, including bleach, can damage the design and cause it to fade or peel.
- Avoid using a tumble dryer. Instead, air dry the shirt to prevent shrinking and fading. Hang it up or lay it flat to maintain its shape and color.
Following these washing instructions will help preserve the quality and appearance of your heat pressed shirt for a longer period of time.
Avoiding Damage
In addition to proper washing, there are a few other practices you should avoid to prevent damage to your heat pressed shirt:
- Avoid ironing directly over the design. The heat from the iron can cause the design to melt or distort.
- Avoid using fabric softeners. Fabric softeners can leave residues on the shirt that interfere with the adhesion of the heat pressed design.
- Never dry clean your heat pressed shirt. The chemicals used in dry cleaning can damage the design and the fabric.
By caring for your heat pressed shirt properly, you can extend its lifespan and enjoy the vibrant design for a long time to come.

Heat Pressing Tips for Hats and Mugs
Did you know that heat pressing is not limited to shirts? You can also use a heat press to customize hats and mugs, expanding your creative possibilities. Whether you want to add your favorite design, logo, or personalized message, a heat press can help you achieve professional-looking results. In this section, we'll explore the process of heat pressing hats and mugs, including the use of heat transfer vinyl and sublimation transfers.
Heat Pressing Hats
When heat pressing hats, you have two main options: using a flat press or a special hat press. Let's take a closer look at both methods:
| Method | Pros | Cons |
|---|---|---|
| Flat Press | Can be used for various hat sizes and styles | May require additional accessories to ensure proper positioning |
| Hat Press | Designed specifically for hats, ensuring proper alignment and pressure | Limited to hat pressing only |
Before heat pressing the hat, consider the material and shape of the hat. Some fabrics may require different temperature settings to ensure optimal adhesion. Moreover, position the hat on the heat press carefully to avoid any obstructions, and always follow the specific instructions provided with the heat transfer vinyl.
Heat Pressing Mugs
Mugs are another popular item for customization, and heat pressing allows you to create unique designs that can withstand regular use and washing. Here are the two main options for heat pressing mugs:
| Method | Pros | Cons |
|---|---|---|
| Heat Transfer Vinyl | Versatile and can be used for various mug types | Requires cut designs and manual positioning |
| Sublimation Transfers | Allows for full-color designs and seamless coverage | Requires sublimation ink and compatible mugs |
When heat pressing mugs, it's essential to ensure a secure and even application. Be mindful of the material of the mug and adjust your temperature and pressure settings accordingly. Follow the specific heat pressing instructions provided with the chosen transfer method to achieve the best results.
Remember, whether you're heat pressing hats or mugs, it's crucial to pay attention to the specific instructions for each type of transfer. Taking the time to understand the unique requirements of each item will help you achieve professional and long-lasting results that your customers will love.
Now that you have the tips and techniques for heat pressing hats and mugs, let your creativity flow and bring your designs to life on a variety of products.

Conclusion
Heat pressing a shirt is a simple and effective method for crafting personalized designs. By following our step-by-step guide, correctly setting up your heat press, and selecting the right materials, you can achieve impeccable results with every press. It's essential to take proper care of your heat pressed shirt to ensure the durability of the design. Whether you're starting a t-shirt business or exploring a new hobby, heat pressing opens up a world of creative possibilities for customization and self-expression. So, embrace your inner artist and experience the satisfaction of wearing or selling your own heat pressed shirts!
Source Links
- https://blog.transferexpress.com/how-to-heat-press-a-t-shirt-step-by-step-guide/
- https://heatpressfun.com/blogs/heat-press/how-to-use-a-heatpress
- https://www.allprintheads.com/blogs/news/how-to-use-a-heat-press-machine-step-by-step-instructions

I'm Morgan, the creator of VPNForMe — a site born from too many hours spent side-eyeing sketchy VPN reviews and buffering videos.
I wanted a place where people could get straight answers about privacy, streaming access, and which VPNs actually deliver — without the hype or tech jargon.