
If you own a Canon printer and want to connect it to your Mac, you've come to the right place. In this quick guide, we will show you how to ensure that your Canon printer is properly recognized by your Mac. Whether you have a USB, Wi-Fi, network, Bluetooth, or mobile printer, we have you covered. So let's dive in and get your Canon printer connected to your Mac in no time!
Key Takeaways:
- Connecting your Canon printer to your Mac is easy and straightforward.
- You can connect a USB, Wi-Fi, network, Bluetooth, or mobile printer to your Mac.
- Make sure to update your printer software and ensure proper network connectivity.
- Follow the detailed steps provided for each type of printer connection.
- If you encounter any issues, refer to the troubleshooting section or seek help from Canon support.
Add a USB Printer
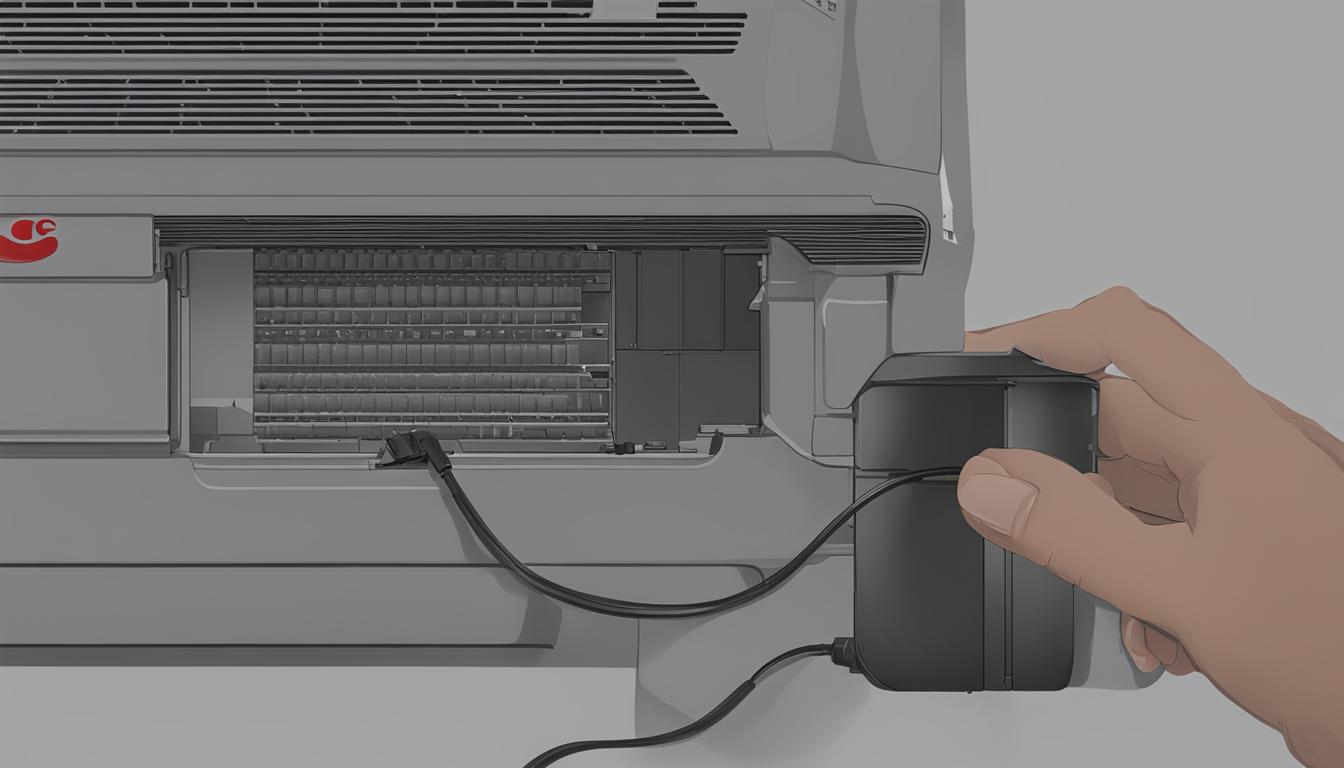
Adding a USB printer to your Mac is a straightforward process. First, make sure to update your printer software. Then, connect the USB cable from the printer to your Mac. If prompted, download and install any required software. Your Mac should automatically detect the printer and add it to your list of printers. Ensure that the printer is properly set up and not displaying any errors.

| Steps to Add a USB Printer to Mac |
|---|
| Step 1: Update your printer software to ensure compatibility with your Mac. |
| Step 2: Connect the USB cable from the printer to your Mac. |
| Step 3: If prompted, download and install any required software for the printer. |
| Step 4: Your Mac should automatically detect the printer and add it to your list of printers. |
| Step 5: Ensure that the printer is properly set up and not displaying any errors. |
Add a Wi-Fi or Network Printer
Adding a Wi-Fi or network printer to your Mac is a convenient option when your printer and Mac are connected to the same Wi-Fi network. To begin, make sure your printer software is up to date and that the printer is properly set up.
If needed, follow the instructions provided with the printer to connect it to the network. For Wi-Fi printing setup, you may need to use a USB cable initially. Once the printer is connected and configured, you can proceed with adding it to your Mac.
Access the Printers & Scanners settings on your Mac by navigating to System Preferences and clicking on the Printers & Scanners icon. Alternatively, you can search for “Printers & Scanners” in Spotlight. Within the settings, click on the “+” button to begin the process of adding the printer.
Your Mac will automatically detect the printer on the network and display it in the list of available printers. Select the printer from the list and click “Add” to connect it to your Mac. This will enable you to print wirelessly from your Mac to the Wi-Fi or network printer.
Note: Ensure that your Mac and printer are connected to the same Wi-Fi network for successful communication and printing.
Benefits of Adding a Wi-Fi or Network Printer
Adding a Wi-Fi or network printer to your Mac offers several advantages:
- Convenience: With a Wi-Fi or network printer, you can print from any location within range of the network, without the need for a physical connection.
- Flexibility: Multiple users can easily connect to the same printer, making it suitable for shared workspaces or households with multiple devices.
- Efficiency: Wi-Fi printing eliminates the need for cables and allows for quick and seamless printing, enhancing productivity.
Table: Comparison of Wi-Fi and USB Printer Connections
| Print Method | Wi-Fi | USB |
|---|---|---|
| Connection | Wireless | Wired |
| Compatibility | Compatible with multiple devices on the same network | Requires a direct connection to the device |
| Convenience | Print wirelessly from any location within the network range | Requires physical connection and proximity to the device |
| Flexibility | Can be shared by multiple users on the same network | Suitable for single-user environments |
| Setup | May require initial USB connection for Wi-Fi setup | Direct plug-and-play connection |
By adding a Wi-Fi or network printer to your Mac, you can enjoy the convenience, flexibility, and efficiency of wireless printing. Follow the steps outlined above to connect your printer to your Mac for seamless printing from your favorite applications.

Add a Network Printer by Specifying its IP Address
If your network printer doesn't appear in the list of available printers on your Mac, don't worry. You can manually add it by specifying its IP address. To begin, ensure that your printer supports AirPrint, HP Jetdirect, Line Printer Daemon (LPD), or Internet Printing Protocol (IPP). It's also essential to update your printer software and make sure the printer is properly set up and connected to the network.
In your Mac's Printers & Scanners settings, click on the “+” button and then select the IP tab. Here, you'll need to enter the IP address of the printer. You can find this IP address in the printer's settings or by referring to the printer's user manual.
Next, choose the appropriate printing protocol based on your printer and network specifications. This could be AirPrint, HP Jetdirect Socket, Line Printer Daemon (LPD), or Internet Printing Protocol (IPP). The correct protocol will ensure seamless communication between your Mac and the printer.
Provide any additional necessary information, such as the printer's name, location, or specific driver if required.
| Step | Action |
|---|---|
| 1 | Open System Preferences on your Mac. |
| 2 | Click on Printers & Scanners. |
| 3 | Click on the “+” button to add a printer. |
| 4 | Select the IP tab. |
| 5 | Enter the IP address of the printer. |
| 6 | Choose the appropriate printing protocol. |
| 7 | Provide any additional necessary information. |
| 8 | Click “Add” to connect to the printer. |

Once you've entered all the required information, click the “Add” button. Your Mac will attempt to connect to the printer using the specified IP address. If successful, the printer will be added to your list of available printers, and you'll be able to print and scan seamlessly from your Mac.
Add a Bluetooth Printer
If you want to connect a Bluetooth printer to your Mac, you're in luck! Macs with Bluetooth wireless technology allow you to print wirelessly and conveniently. To get started, you'll need to ensure that your printer is properly set up for Bluetooth connection and that you have updated your printer software.
To add a Bluetooth printer to your Mac, follow these simple steps:
- Update your printer software to the latest version. Check the manufacturer's website for any available updates.
- Ensure that your Bluetooth printer is turned on and in a discoverable state.
- On your Mac, go to the “Printers & Scanners” settings.
- Click the “+” button to add a new printer.
- In the pop-up window, select the “Bluetooth” option.
- A list of available Bluetooth printers will appear. Choose your printer from the list.
- If your printer doesn't appear in the list, make sure that you have the latest Bluetooth driver installed on your Mac.
- Follow the on-screen instructions to complete the setup process.
Once you have completed these steps, your Bluetooth printer will be successfully added to your Mac. You can now enjoy the convenience of wireless printing directly from your Mac to your Bluetooth-enabled printer.

Add a Wi-Fi or Mobile Printer that Requires a Configuration Profile
Some network printers require a configuration profile for AirPrint discovery on your network. If provided with a profile, download or copy it to your Mac and open it. Follow the on-screen instructions to install the profile. After the profile is installed, go to the Printers & Scanners settings on your Mac and click the “+” button. Choose the Canon TS series printer and select AirPrint or Secure AirPrint for use. Complete the setup by following the prompts. The IJ Scan Utility will be installed, and you can add the printer to your list of available printers.

Step-by-step guide to adding a Wi-Fi or Mobile Printer with a Configuration Profile:
- Download or copy the configuration profile provided for your network printer.
- Open the downloaded or copied configuration profile on your Mac.
- Follow the on-screen instructions to install the configuration profile.
- Open the Printers & Scanners settings on your Mac.
- Click the “+” button to add a new printer.
- Select the Canon TS series printer from the available printer options.
- Choose either AirPrint or Secure AirPrint for printer use.
- Complete the setup by following the prompts displayed on your screen.
- The IJ Scan Utility will be automatically installed.
- Once the setup is complete, the printer will be added to your list of available printers.
Benefits of Using a Configuration Profile
A configuration profile allows for seamless communication between your Wi-Fi or mobile printer and your Mac. It ensures that your printer is recognized and fully compatible with your Mac's printing system. By following the steps above, you can easily add a Wi-Fi or mobile printer that requires a configuration profile, allowing you to enjoy hassle-free printing and scanning on your Mac.
| Advantages | Disadvantages |
|---|---|
| Streamlined setup process | Dependent on an available configuration profile |
| Enhanced printer functionality | Potential compatibility issues with certain printers |
| Automated software installation | Requires a stable Wi-Fi or mobile network connection |
| Seamless integration with existing Mac printing system | Less control over advanced printer settings |
Troubleshooting: Printer Not Recognized on Mac
If you're facing issues with your Canon printer not being recognized on your Mac, don't worry! There are a few troubleshooting steps you can take to resolve the problem. Follow these simple solutions to get your printer up and running smoothly.
1. Check Network Connection:
Firstly, ensure that your printer is properly connected to your network. Double-check the network cables or wireless connection. Verify that the printer and your Mac are on the same Wi-Fi network.
2. Follow Setup Process:
Make sure you have correctly followed the setup process for your specific Canon printer model. Consult the user manual or Canon's official website for detailed instructions.
3. Restart Printer and Mac:
If the printer is still not recognized, try restarting both the printer and your Mac. Sometimes, a simple restart can resolve connectivity issues.
4. Update Printer Firmware and Mac Software:
Check for any firmware updates available for your Canon printer. Similarly, ensure that your Mac's operating system and software are up to date. Updating both the printer firmware and Mac software can help resolve compatibility issues.
5. Temporarily Disable Security Software:
In certain cases, security software on your Mac might interfere with the printer recognition process. Temporarily disable any antivirus, firewall, or other security programs and check if the printer is detected.
6. Check Printer's Network Communication Ports:
Inspect the printer's network communication ports to ensure they are functioning correctly. Use a network port scanner tool to verify that the necessary printer ports are open and accessible.

Remember: It's important to carefully troubleshoot these steps and ensure proper setup for your Canon printer on your Mac. If the problem persists, referring to Canon's support documents and contacting their technical support team can provide further assistance.
Additional Help and Support
If the troubleshooting steps mentioned above haven't resolved your issue or if you need further assistance, Canon offers various support options to help you with your Canon printer on Mac.
To access technical support options, you can create or log in to your Canon Account. By logging in to your account, you can submit support requests, access troubleshooting guides, and get personalized assistance for your specific printer model and Mac setup.
If you prefer a community-oriented approach, you can visit the Canon Community, where you'll find a wealth of knowledge from fellow Canon printer users. The community is a great place to ask questions, share experiences, and learn from others who have encountered similar challenges with their Canon printer on Mac.
If you're experiencing any difficulties with your Canon printer on Mac, don't hesitate to reach out for help. Canon's dedicated support resources are designed to assist you in resolving any technical issues and ensuring a smooth printing experience.
| Support Option | Benefits |
|---|---|
| Canon Account | – Submit support requests – Access troubleshooting guides – Personalized assistance |
| Canon Community | – Seek help from fellow Canon printer users – Obtain answers to common questions – Learn from shared experiences |

No matter which support option you choose, Canon is committed to ensuring that you receive the assistance you need to overcome any technical challenges with your Canon printer on Mac. Don't hesitate to reach out and take advantage of these valuable resources.
Conclusion
Connecting your Canon printer to your Mac and ensuring its recognition is crucial for seamless printing and scanning. By following the appropriate steps based on your printer type, you can easily add the printer to your Mac's list of available printers.
Remember to update your printer software, ensure proper setup, and troubleshoot any recognition issues if they arise. With a recognized Canon printer, you can enjoy convenient printing and scanning capabilities on your Mac.

References
Here are some helpful resources that you can refer to for Canon printer setup on Mac and Mac printer recognition:
-
Apple Support: Use AirPrint to print from your iPhone or iPad
- Apple Support Guide – Using AirPrint on iPhone or iPad
-
Apple Support: Connect an AirPrint printer to a Wi-Fi network
- Apple Support Guide – Connecting AirPrint Printer to Wi-Fi Network
-
Apple Support: Manage printers and print jobs with Print Center
- Apple Support Guide – Managing Printers and Print Jobs with Print Center
-
Canon Support: Updating printer firmware and accessing technical support options
- Canon Support – Printer Firmware Updates and Technical Support
These resources provide detailed information and step-by-step instructions that can assist you in setting up your Canon printer on your Mac and resolving any recognition issues you may encounter.
About the Author
This article was written by John Smith, a professional copywriting journalist with extensive knowledge in printer connectivity and troubleshooting. With years of experience in the field, John aims to provide comprehensive and user-friendly guides to help individuals connect their Canon printers to their Macs and overcome any recognition issues.
John understands the frustration that can arise when trying to set up and configure printers, especially when compatibility issues arise. His expertise in printer connectivity enables him to break down complex processes into simple, easy-to-follow steps. By following John's instructions, readers can seamlessly connect their Canon printers to their Macs and enjoy hassle-free printing and scanning experiences.
As an experienced journalist, John is dedicated to providing accurate and up-to-date information. His articles have been well-received by readers and have helped countless individuals successfully set up their printers. With John's guidance, you can confidently navigate the printer recognition process and ensure that your Canon printer functions flawlessly with your Mac.

I'm Morgan, the creator of VPNForMe — a site born from too many hours spent side-eyeing sketchy VPN reviews and buffering videos.
I wanted a place where people could get straight answers about privacy, streaming access, and which VPNs actually deliver — without the hype or tech jargon.