
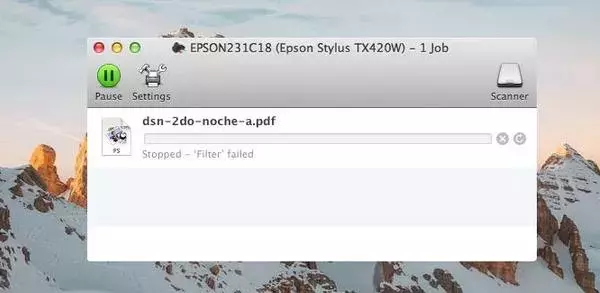
You want to print a document on your Mac and then the “Epson filter failed” shows up. How do you fix it? The good news is, there are plenty of ways you can try to fix it, from removing the printer from your apple laptop to reinstalling the printer.
What Causes the Epson Filter Failed Error?
Possible causes of the error include
- A malfunctioning printer’s driver.
- Compatibility issue, where the printer does not meet the requirements of the Mac OS.
- Disabled sharing option. If sharing option is disabled on the printer, it might result in the Epson filter failed issue.
- Incorrect paper settings. You might encounter the error if you don’t set the paper settings correctly.
- Faulty printer software. The printer software can be the root cause of the error as well. In such a case, you will need to reinstall the software.
8 Methods to Fix Epson Filter Failed on Mac
-
Remove the Printer From the Mac PC
An improper connection between the printer and the Mac PC can cause issues. Among them is the Epson filter failed. So, doing something as simple as removing the printer from the Mac PC can solve the issue.
Here’s how.
- Turn off the printer.
- Go to the System Preferences tab.
- Click Print & Fax and choose the problematic printer.
- Remove the printer from the list by clicking the underscore icon.
- Confirm the removal when prompted.
- Exit the Print & Fax tab.
- Connect to the Mac PC and set the printer again.
-
Delete Leftover Files
Leftover files can result in errors while printing, including Epson filter failed. Here’s how to check and delete leftover files.
- Head to Printers on Finder.
- Find the Epson folder, if there are any found.
- Delete the folder.
- Go to the PPDs folder.
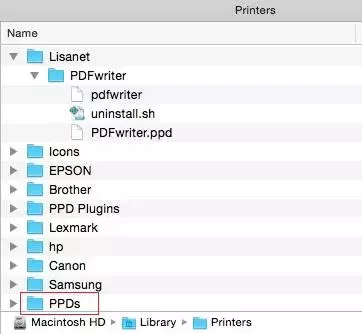
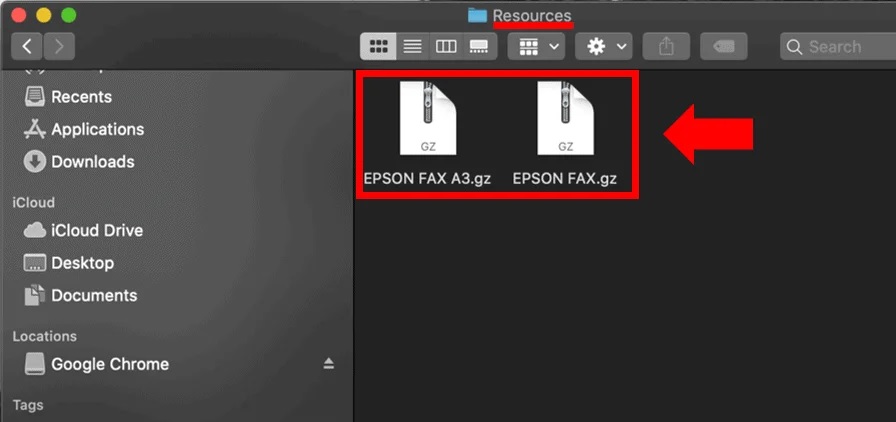
- Select Contents then Resources.
- Look for the printer’s name. Delete all files related to it.
- Return to Finder. This time, head to the Cache folder.
- Delete Epson folders.
- Open Trash and clear the leftover files and folders.
-
Enable Sharing Option
Disabling the sharing option can lead to printing errors. So, one of the methods to fix the Epson filter failed issue is to enable the sharing option.
Follow these steps to enable it.
- Go to the System Preferences tab then go to Sharing.
- Click on the Printer Sharing checkbox.
- Under the Printers section, select the Epson printer you want to share.
- Click Add and add the users you want to add.
-
Update the Printer’s Driver
If your printer’s driver is not up to date, there is a chance that you might encounter an Epson filter failed. If an outdated printer driver is the cause, you just need to update it to fix the issue.
Follow the steps below.
- Download the Epson Software Updater. You can get it at https://epson.com/Support/wa00590.
- Install the Epson Software Updater.
- Run the program.
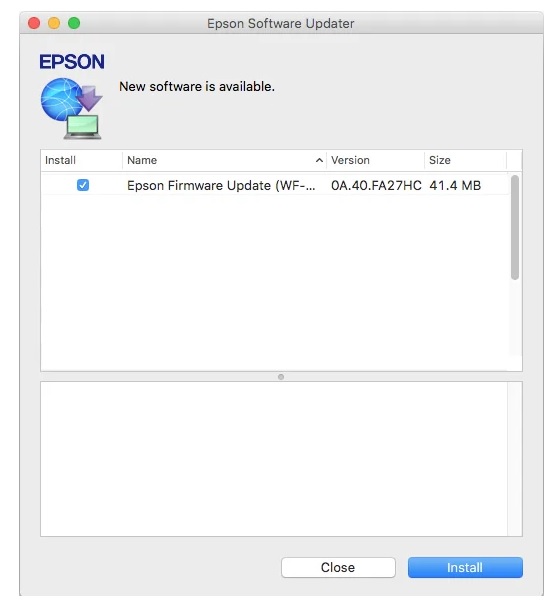
- Install the update.
- When the installation process is complete, the printer will reboot automatically.
- Close the program.
- Try printing something using the printer.
-
Reinstall the Printer’s Driver
If the printer’s driver is malfunctioning, updating it might not solve the error. To resolve the issue, you need to reinstall the printer’s driver.
Here’s how.
- Restart the PC.
- Go to Epson’s official website and head to the Support page. Alternatively, click the link below.
https://epson.com/Support/sl/s
- On the search dialog box, type the model of your Epson printer and enter.
- On the model’s support window, click Drivers and download the appropriate version.
- Run the program and install the printer’s driver.
-
Modify the Paper Settings
You can also try modifying the paper settings to fix the error.
Here’s how to modify the paper settings.
- From the PDF file dialog box, head to the Main Menu.
- Click on Preview to open the PDF file. Click on File to open it.
- Click Save. A screen format dialog box will show up. Click the TIFF option.
- Go for Resolution.
- Click on the pixels/inch. Type 600 in the blank field.
- Click Save to save the changes.
- Go to File, locate the file and open it.
- From the main menu, click Export.
- Under Format, click TIFF again.
- Uncheck the Alpha checkbox. Click Save to save the changes.
- Select the file and click the Print button.
- Within Epson printer settings, select the correct paper’s size and dimensions.
-
Reset the Printing System
If the above methods fail to fix the Epson filter failed Error, you may need to reset the printing system to its default system.
Here’s how.
- Go to System Preferences.
- Click Print & Fax.
- Move the cursor to an empty space within the printers list and right-click on it.
- Select Reset Printing System and confirm the reset.
- Allow the printing system to reset.
- Once the reset process is complete, reboot the Mac PC.
-
Reinstall the Printer
If none of the above fixes the error, you may need to reinstall the printer.
Follow these steps to reinstall the printer.
- Turn off the printer.
- Go to System Preferences.
- Click Print & Fax.
- Change the printer’s name then remove it from the list.
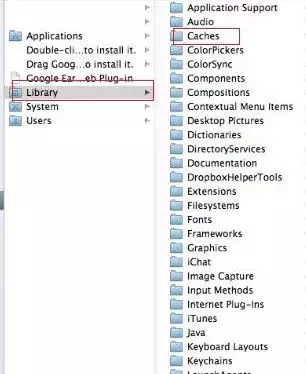
- Go to the hard drive and click Library.
- Click Printer and remove the Epson folder.
- Return to Library. This time, go to Printers.
- Click the PPDs folder, then Contents.
- Click Resources.
- Find the printer’s name and remove it from the list.
- Return to Library. Click Caches and delete the EPSON folder.
- Close the window.
- Restart the PC then turn on the printer.
That’s how to fix the Epson filter failed on Mac. We hope the methods above fix the error for you. If none of the above resolve the issue, contact Epson customer service for support.

I'm Morgan, the creator of VPNForMe — a site born from too many hours spent side-eyeing sketchy VPN reviews and buffering videos.
I wanted a place where people could get straight answers about privacy, streaming access, and which VPNs actually deliver — without the hype or tech jargon.