
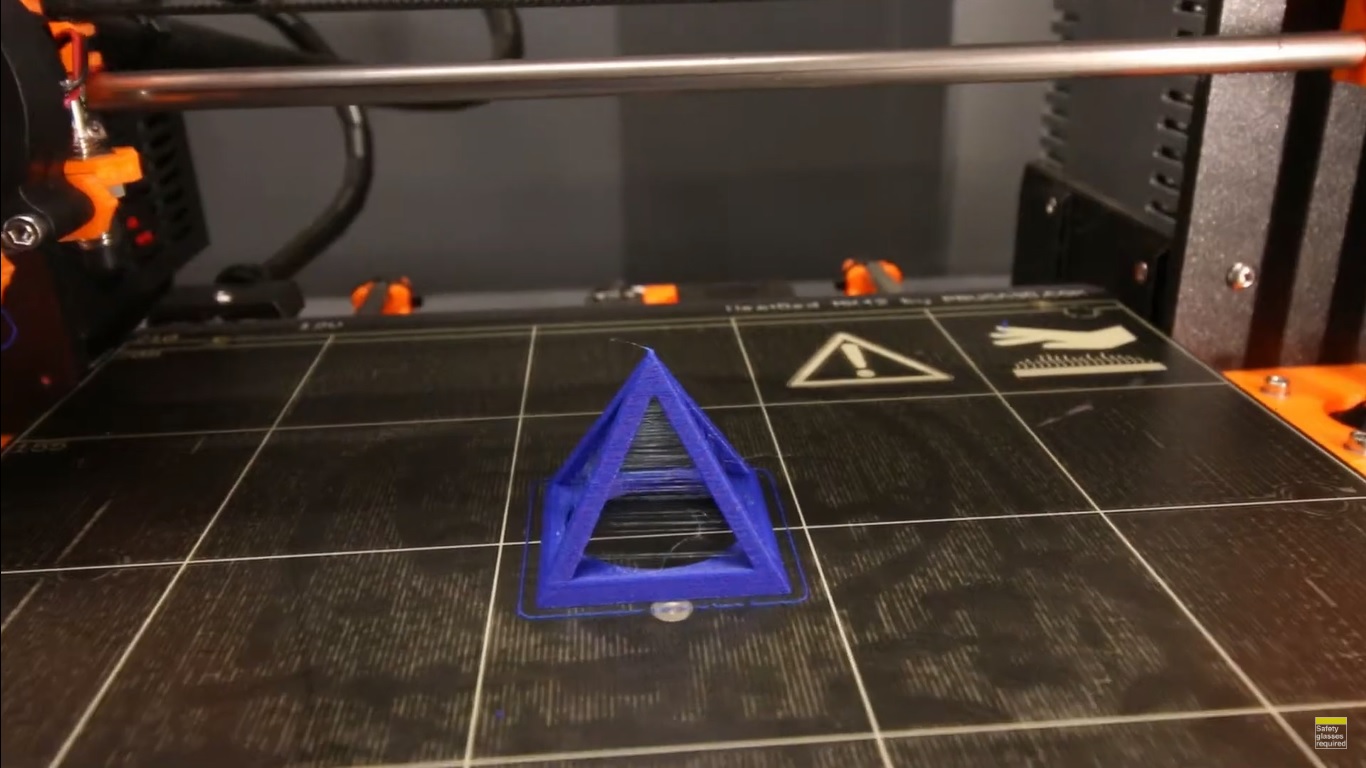
Stringing is a common issue that occurs on your 3D printer. Hence, it is important to know how to clean up stringing on 3D print. This error is easy to fix and you don’t need to be scared that the printer will get damaged. Here are some ways to fix it quickly and why this issue occurs.
Adjusting The Speed of Printing
The speed of printing is one of the factors that may cause the stringing cases on your 3D printer. This is the easiest way to remove the stringing, especially if you use molten plastic for printing material. It is not durable and hardens itself. The stringing phase starts after that.
To avoid this case, you can check the setting on the printer. The speed can be controlled by the user since the printer might use different materials. What do you have to do with the speed of the printer? You have to increase the speed of printing by more than the ideal speed to make it work.
How to clean up stringing on 3D print is using 199-200 mm per second. This travel speed is more than ideal, yet it won’t damage the result. The design appears ideally on the printer bed. It doesn’t move too fast or too slow, so the stringing case is unlikely to happen on the 3D printer.
Checking The Condition of Filaments
Filaments also become the factor to cause the stringing. How to clean up stringing on 3D print is to make the filaments stay dry. Some popular filaments are ABS, PVC, and PLA. Those materials will absorb the water from the air if your ambient has high humidity.
What happens if the filaments absorb the water? They will stick to the nozzle and it is bad for the 3D Printer. Once the heating process is occurring, a tiny bubble will pop up. It leads to an ugly appearance on the surface and this is also how the stringing case occurs on the printer.
Therefore, you have to make sure that the filament's condition is dry before you apply it for printing purposes. How to store it well? The filaments are better in a sealed plastic bag. The sealed plastic is good to protect the filaments from moisture in the air.
Another option you can do is protect the filaments which are silica gel. It is cheap and works well to absorb moisture around the filaments. If you find out that the filaments are already absorbing the moisture, you can prepare some packs of silica gel to absorb the moisture from the filaments.
Blowing Some Hot Air
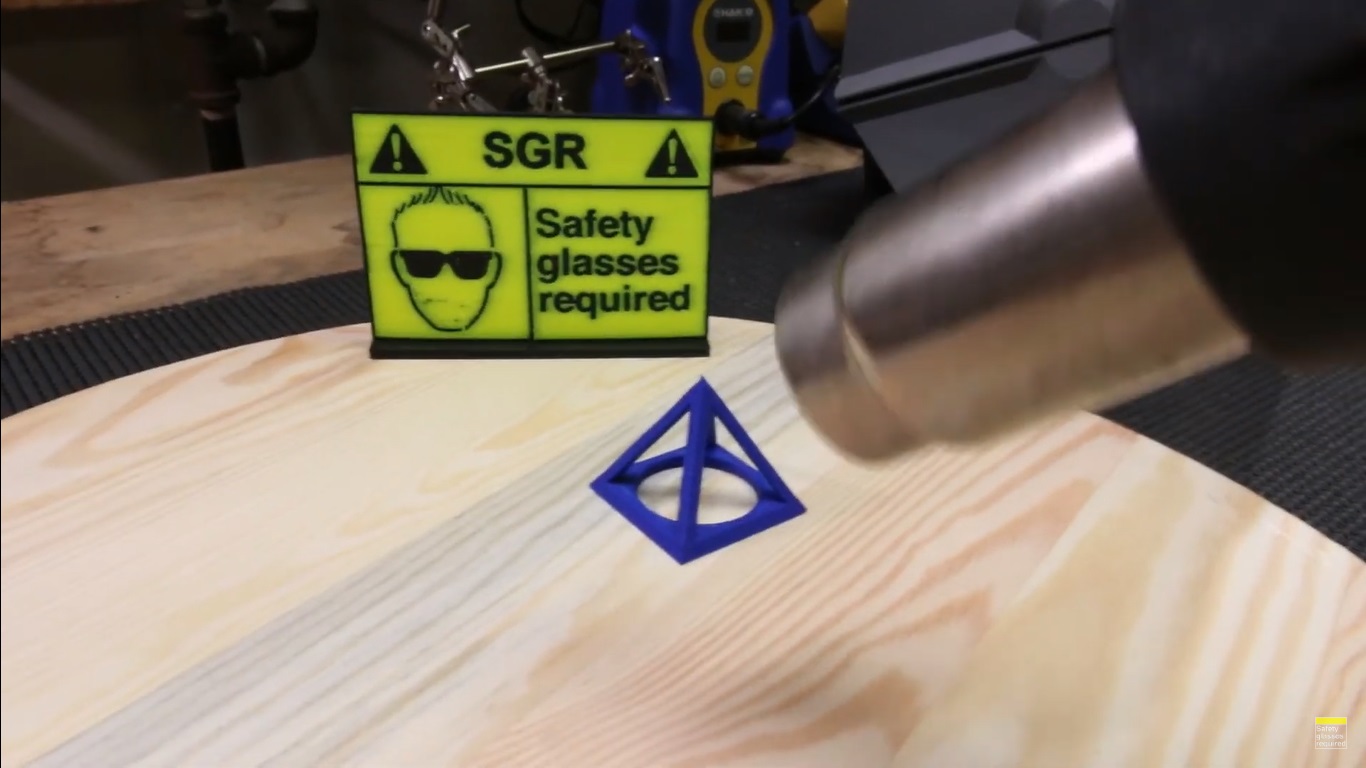
You might never expect that hot air works well as how to clean up stringing on 3D print. The thermoplastic material will melt easily if you blow some hot air on the filaments. The heat works well to prevent the stringing case on your 3D printer.
How to get the hot air? There are two options. The first one is coming from a heat gun. The heat gun usually will melt the glue stick in a few seconds. This time, you can use it without the glue stick. You can point out the filaments with the tip of the turned-ON heat gun.
The second method is blowing the hot air from a hair dryer. This method is working by blowing from every side of the printer. You have to set up the hair dryer to the highest temperature. If the tool doesn’t have it, you can blow it in a few minutes. The stringing filaments will melt.
Cleaning The Stringing with Acetone
Acetone is a powerful cleaning agent and it can be the material for how to clean up stringing on 3D prints. It can remove many kinds of filament material safely because it is non-hazardous. You can remove the stringing part on the printer or the residue after the heating process from hot air.
You don’t need much acetone to remove the stringing. It is a cheap option, yet the result is good enough. Acetone is also easy to find at the market and sometimes many people use it to remove nail polish and practical.
But how to clean up stringing on 3D print with acetone? You can pour the acetone on the dry cloth. After that, wipe the stringing part on the printer gently. You can pour the acetone on the bed as well as long as the component doesn't get poured with the acetone.
Checking The 3D Printer Temperature
Some types of the printer might experience stringing because the filament has some problems, especially the heat problem. The type of printer such as FDM cannot hold too high heat because the stringing part on the printer will form when the process is occurring.
It is important to check the temperature to avoid the activity of how to clean up stringing on 3D print. If you find out that the heat is too high, you have to lower the temperature. However, the temperature level should be able to melt the filament, not freeze it.
Each 3D printer has its own standard to melt the filament. You have to find the best range to make it work, but it doesn’t cause stringing on the printer. Usually, you have to lower the temperature to about 4-6 degrees Celsius. Check the result again until you find out that it is the best result.
Cleaning The Nozzle
Nozzles can be the reason why the printer has a stringing part when it is printing. It is better to understand how the nozzle works. How to clean up stringing on 3D print because of a nozzle issue? You can check whether the nozzle is dirty or it doesn’t work as it should anymore.
Usually, you will find that the filament is in the nozzle because it gets left. When the filament keeps piling in the nozzle, it becomes dirty because it is no longer filament but residue. This problem is the main reason why stringing cases are serious. The result of printing failed.
You have to check which part of the nozzle gets dirty. If the dirty one is the exterior of the nozzle, you can use a wire brush to clean it. It is safe because the outer part is from hard materials such as steel, aluminum, or brass. Hard cleaning will not affect it badly.
It is different when the inside of the nozzle gets dirty because of the filament. How to clean up stringing on 3D print inside the nozzle? You can use the cleaning agent for filament. It is reusable once the same case occurs in the future, but make sure it is staying at room temperature.
Removing The Nozzle
Removing and replacing the nozzle is the way to clean up stringing on 3D print when the cleaning method doesn’t work anymore. Maybe, the nozzle stops working because the nozzle is dirty yet the filament in it is hard to remove. So, the printing result is always the same.
Sometimes, it is not always about the nozzle being dirty. There might be some issues that cannot be seen and the stringing case is occurring even after you remove it with acetone. The nozzle for the 3D printer is affordable. Remember, it is normal to replace the nozzle once in a while.
Calibrating The Retraction
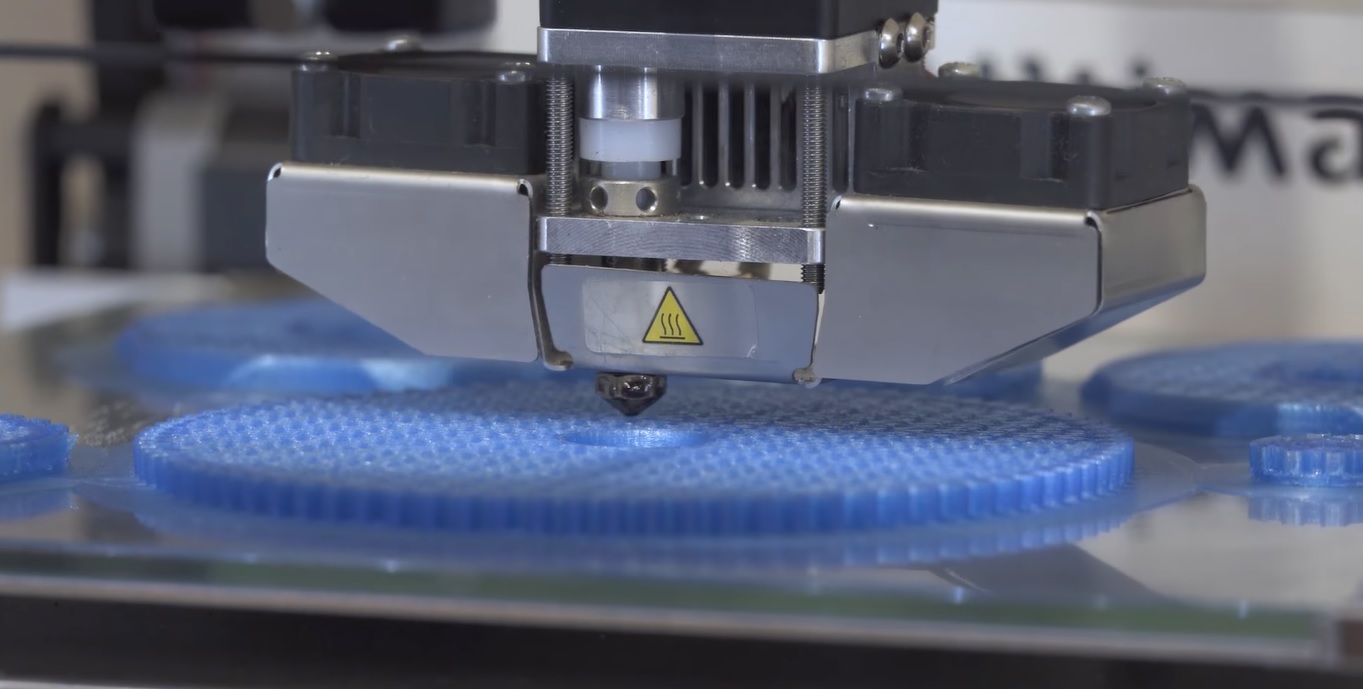
One of the how to remove stringing 3D printing is by calibrating the retraction. The 3D printer has an extruder to run the filament. When it has to stop, the extruder will pull out the filament again. It can cause a stringing case because the nozzle has clogs in it.
Calibrating the retraction is easy because this option is available on the slicing program. You can recheck the smile again and there will be an option to do this. Calibrating is easy and quick. The stringing case can be avoidable if you do calibration once in a while.
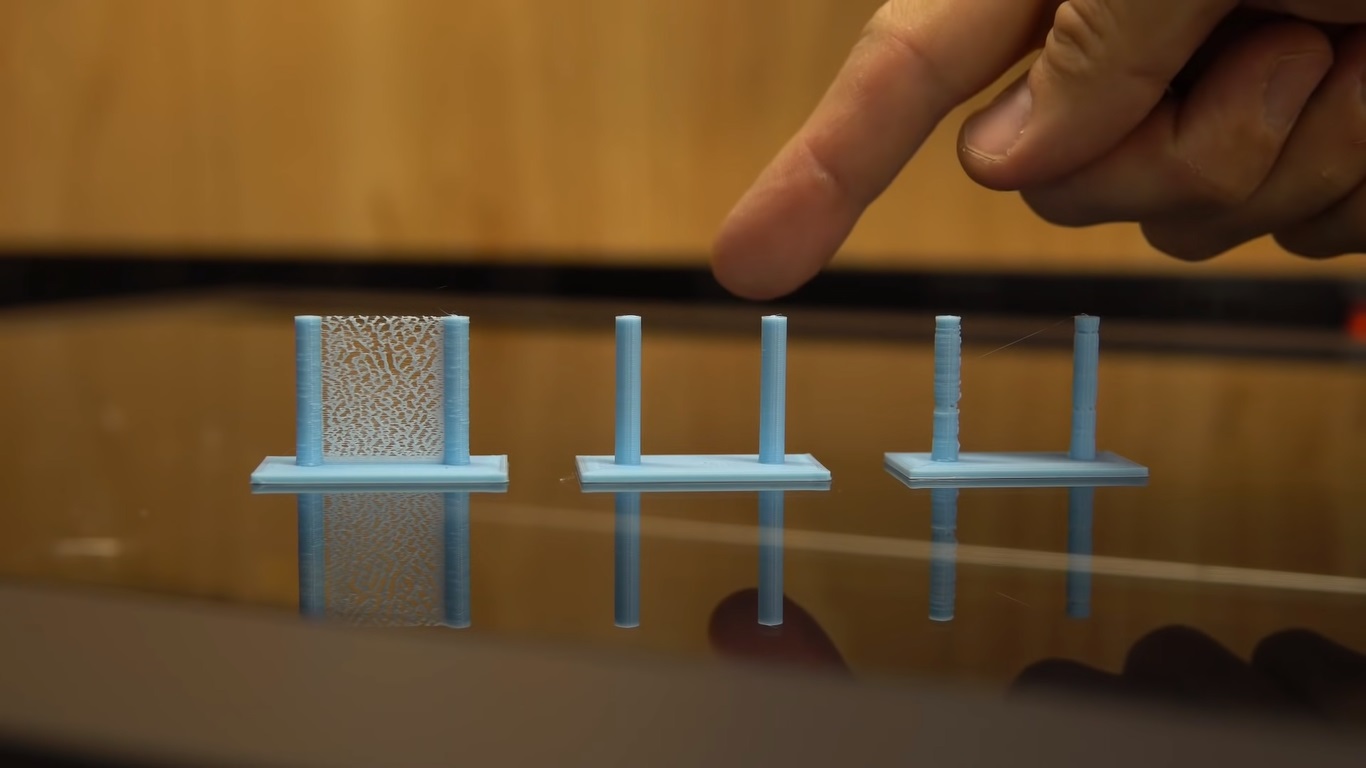
Hence, you might not calibrate the retraction once. Calibrating the retraction might take time because it has a trial-and-error phase. You have to see whether the speed and distance of the drop are doing well. The ideal distance is about 0.5-1mm for all kinds of printers.
After that, check out the speed of the printer as well. The extruder might get some problems because the speed is out of range. Too fast or too slow is the cause of stringing cases. The ideal range of the speed is between 40-60 mm/s.
Choosing The Bowden Tube
The Bowden Tube is the part of the printer to feed the filament. This is from plastic and it exists in all 3D printers. This tube can be the cause of stringing, so how to clean up stringing on 3D print is very important when the tube is too thick in your printer.
Some direct printers might not need Bowden Tube or else, it needs a super thin tube. The application of the tube is super important because the stringing case can be from this issue. If the tip of the tube is too thick, the stringing can be formed as the result on the printer bed.
If the size of the Bowden tube is too wide, it is the main reason why the stringing occurs. The normal size of the Bowden Tube is about 2 mm only. If it causes the stringing, you can get a thinner Bowden tube which is only about 1.7-1.9 mm. The problem will not occur anymore.
Soaking in Acetone
The method of how to clean up stringing on 3D print can be soaking in acetone overnight. The acetone will dissolve filament in the extruder which causes stringing on the printing result. Soaking the nozzle in acetone is the fastest way and most practical. The acetone will remove the clogs because of dried filaments.
You have to adjust the size of the nozzle and also the acetone. You can place the nozzle in a bowl full of acetone. Using acetone is not a big problem at all because the price is affordable. The material is also safe and non-toxic, so it will not harm you at all while soaking the nozzle.
Cleaning The Printer
One of the reasons why the 3D printer always fails to print well and the stringing occurs is the printer itself is dirty. Your 3D print should be in a clean condition to work properly again. The way to maintain its cleanliness is by using a heat gun.
Blowing the heat gun will remove the clogs because of the filament in the nozzle. The heat from the gun will melt the filament and it works well for this issue. If the dirt is not from the nozzle, it means you have to do manual cleaning for the 3D printer as how to clean up stringing on 3D print.
Razor is the tool to remove the stringing since it is sharp and can cut the filament easily. However, you have to be very careful while doing this because you can damage other components with the razor you use.
After that, take sandpaper and rub the residue that you still see on the printer. Handling the sandpaper should be very careful too because it is tough when it gets on your skin. This manual cleaning should be on schedule to avoid more stringing while you are printing your 3D design.
Reason for Stringing and How to Clean Up Stringing on 3D Print
The Temperature is Too High
The main reason why stringing occurs is the temperature of the printer is too high. You need melted filaments while printing, but the too-hot filament is like water. The nozzle will drop the filament uncontrollably and it ends up leaking easily from the nozzle.
This cause is not dangerous for your printer because you only have to set the temperature right. Once it gets fixed, the drip from the nozzle will be more controllable. The final quality will depend on the temperature issue as well.
The Extruder Movement
The extruder movement is something you have to pay attention to because it is the reason why stringing occurs as a result of your printing activity. If the movement isn't right, it will be hard to have the best result. Stringing cases are also hard to avoid.
The length of the movement is the reason why this can be a problem for stringing. For that reason, it is very important for you to learn how to clean up stringing on 3D print according to the issue. You can fix the extruder movement by setting up the programming on the software.
Why The Retraction Setting is Important?
The retraction setting is very important because the setting will control how filament will drip from the nozzle. The stringing problem comes from this issue. Once the move or the printing is out of the way, the problem will occur again and again.
You have to check the distance of the retraction first. Increasing or decreasing the retraction is how the performance will be involved, especially in preventing the stringing case. Not only avoid stringing, but the retraction setting is also how to improve your 3D printer performance.
The methods of how to clean up stringing on 3D print above will help you to fix this issue fast. The extruder’s move is not a big issue for this matter, but it’s more about how clean the printer is. You can practice the methods above to fix and prevent this problem from occurring again in the future.

I'm Morgan, the creator of VPNForMe — a site born from too many hours spent side-eyeing sketchy VPN reviews and buffering videos.
I wanted a place where people could get straight answers about privacy, streaming access, and which VPNs actually deliver — without the hype or tech jargon.