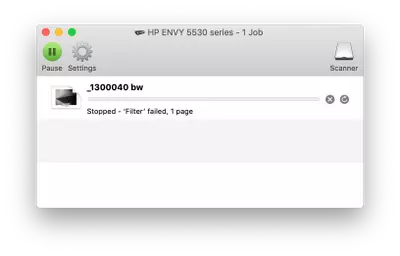
HP printer error filter failed to indicate that there is something wrong with your device. That’s why you cannot use the printer to print the documents. This error means that the printer’s filter is not compatible with the operating system on your computer.
The operating system on your Mac or Windows that are not compatible with the printer’s filter also affects the printing quality. You may want to print the high-quality image but because of the incompatibility, the result has a lower quality. How do you fix this trouble?
Fixing HP Printer Error Filter Failed
The filter failure in an HP printer usually happens on computers with Chromebook OS, Ubuntu, Windows, and Mac. The first thing that causes this error is you don’t install the printer’s driver properly. Or the paper settings may be incorrect. Another reason is you disable the printer’s sharing option.
If you are now facing this HP printer error filter failed, below are some ways to fix the error. Follow every step below and your HP printer should be able to work normally.
1. Reinstall your printer’s driver
Reinstalling your printer’s drivers will help fix the filter failure error. First of all, remove the connection between your printer and your computer. And then connect both devices again. Now, you need to download the latest version of the printer’s drivers. Find the drivers from HP’s official website.
Make sure that you follow all instructions to install your printer’s driver properly. The instructions will appear when you start the installation process. This way, you will eliminate the HP printer error filter failed. If you need some more help, follow the reinstallation process below.
- Click the System Information on your computer and then open the Printers option.
- You are going to see the printer’s drivers. Remove the HP printer that is causing the error.
- Re-add your printer to the computer and then download the latest version of the drivers.
- Install the printer’s drivers and then try to run your printer again.
This first solution is an effective way to fix the filter failure error on your device. You need to try this first method since the driver is usually the main thing that causes this error. But if this solution doesn’t work, you need the next solution for the HP printer error filter failed.
2. Enable your computer’s sharing option
By enabling the computer’s sharing option, you can connect the printer you have and the system you use. You can find this option in the Windows computer’s System Settings. Reach the system settings by opening your computer’s Control Panel.
To help you find and enable the computer’s sharing option, follow the steps below.
- Click the computer’s Start Menu and then run the Control Panel.
- And then open the System Settings where you can find the Sharing option.
- Click on this Sharing option and then enter the system’s name and you will pair it with your printer.
- Now you can simply click the Exit button to save the settings.
After following the steps above, you may want to restart the computer. Restarting your computer once will help save the changes and allow the changes to affect the system. Hopefully, this method can fix the HP printer error filter failed and make your printer run normally again.
3. Modify the paper settings
If your HP printer is still not printing because of the filter failure error, try changing the paper settings. Another thing that causes this error is the incorrect paper settings. Modify your paper settings by previewing your documents. And then click the TIFF option that appears in the dialog box.
Next, save the changes and then export the document through your TIFF option. You also need to uncheck the Alpha option before saving the changes again. Now you can print your documents easily. If you need extra help with this method to fix the HP printer error filter failed, read the instructions below.
- While printing any PDF file, access the Main Menu in the dialog box of your PDF file.
- Now open the Preview section and you will open the PDF. Then click on File to open and click on the Save menu.
- Choose TIFF on the format dialog box that appears on your monitor. Now access the Resolution window and then click the Pixels/inch option.
- In the blank space, enter 600 and then click Save to save your new settings. Open the File menu and click Export.
- Now you need to click on the TIFF option again from the Format dialog box. Uncheck the Alpha box before clicking the Save button.
- Choose File and then click the Print option.
After following the steps above, the HP printer error filter failed should disappear. But don’t forget to choose the correct paper dimensions and paper size and then complete your printer settings. You also need to install the drivers of your printer in the system again.
4. Resetting printer settings on Mac
If you are experiencing this HP printer error filter failed while using Mac, try resetting the printer’s settings. Run the System Preference and then access the Print and Scan where you can find the option of Reset Printing. Or, you can follow the steps down here.
- Click the Apple icon and then press the button of System Preferences.
- Now locate the Print and Fax or Print and Scan option from the dialog box that appears on your monitor.
- Then you are going to see the option of Reset Printing after clicking the blank text field on the printer’s list.
- There is going to be a Reset button in the dialog box that confirms your action. Click on that button.
- Use the respective login credentials to sign in to your system as an Admin. Next, click OK and then wait for your system to reset and there is nothing in the Printers list.
- And then Add the HP device and click the button of Print Using and then choose the Airprint option as default.
There are some ways to help you fix the HP printer error filter failed. The three ways above are for Windows computers while the last one is for Mac computers. Learn all solutions and see which solution works best.

