
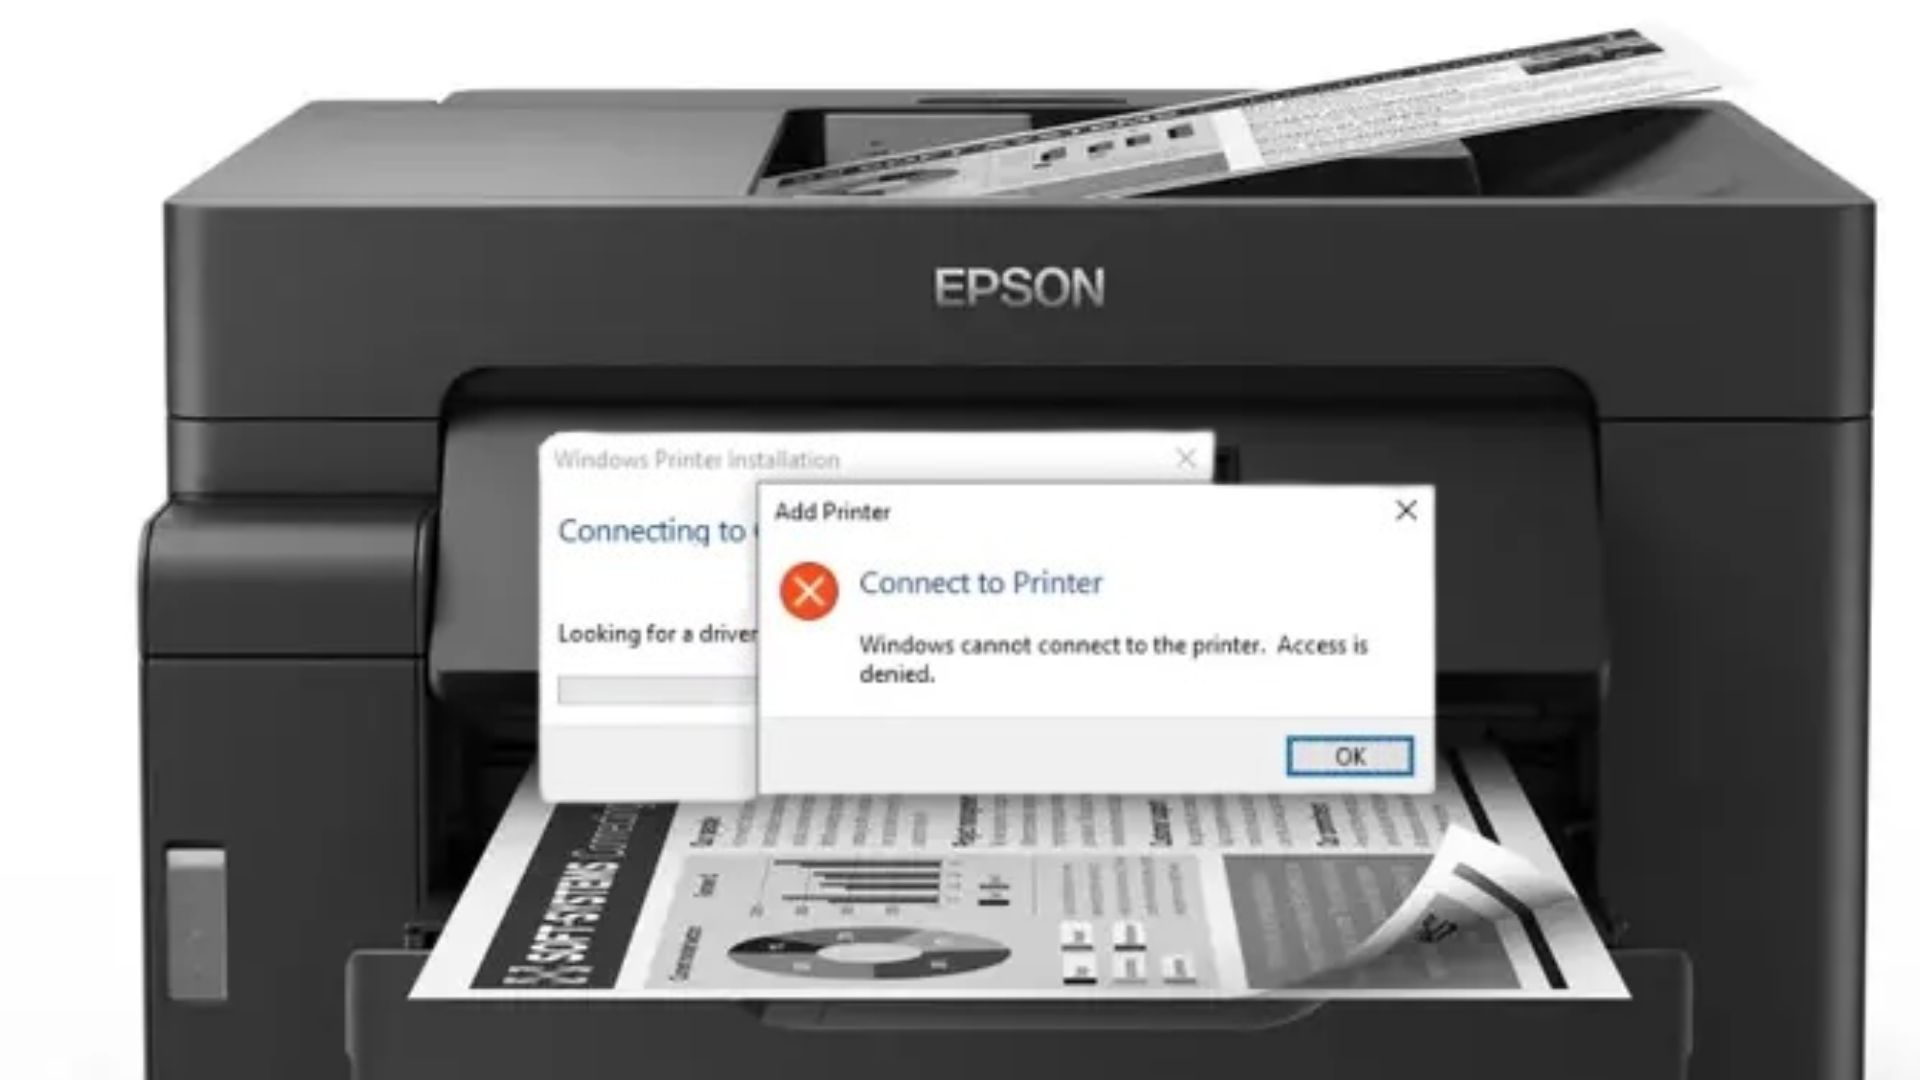
Windows computer is now the most famous computer type people use around the world. Unfortunately, this famous OS isn’t free from any trouble. One common problem is Windows cannot connect to the printer access is denied, you need to fix it immediately to start printing normally again.
Reasons for Access Denied Error on Windows Computers
The access denied error may appear when you try to connect any printer to your Windows computer, whether Windows 7, 10, 11 or even the older versions. Various conditions may cause this trouble. Usually, driver issues and hardware issues cause the access denied error on Windows computers.
This error is going to prevent you from connecting both devices, it shows you that the connection between your printer and computer isn’t good. It is essential to find the thing that causes this error. Thus, you’ll find the right solution and will be able to fix the error to use the printer as usual.
1. The faulty connection between both devices
Users may encounter several errors with their printer, such as the access denied error when they are trying to connect two devices. This error may occur because of a connection issue when you try to connect your computer to the printer. The connection issue blocks you from accessing the printer.
Checking the cables will help you figure out the issue that causes this error. If you are trying to connect a printer and a Windows computer through a wireless network, check the network again. Fixing the connection usually will help you fix the error and finally your printer can connect to the PC.
2. Another connected printer is interfering
Users of Windows 11 can connect many printer devices to their computer and then choose the available one to start printing. Keep in mind that connecting many concurrent printers to the PC will cause an error in your computer. Blame the printers that are connected but are not used at the moment.
Those connected printers are going to impede the access and connection between your computer and another printer you try to connect. These devices may also install drivers on the computer that you don’t really need. Those unnecessary drivers will become corrupt and faulty and then cause an error.
3. Faulty or corrupt printer drivers
You will face a lot of issues and errors if the driver of your printer is old or corrupt. This old printer driver is going to impede the connection between your computer and the printer. As the result, you are going to see an access denied error on your Windows 10 computer.
Moreover, a faulty or outdated printer driver may also cause an error because your computer doesn’t get the patches and updates that will fix any bug on your printer. Printer companies are always updating their products’ drivers to help their loyal users fix all bugs and prevent any issues from occurring.
4. Outdated Windows
Never updating your computer’s operating system is not only dangerous but will also cause many errors to your computer. An outdated operating system may be the culprit of the connection error between your printer and the computer. It may also cause some other issues you don’t even realize.
No matter which Windows version you are using (11, 10, 7, or older), make sure that you always download any available software update. Windows is providing software updates for the user’s convenience. You’ll be happy to use your computer with zero problems with the latest software version.
Those four reasons are likely the most famous reasons behind the access denied error when you try to connect a Windows computer with any printer. After figuring out the reason that causes the error between your computer and your printer, find the right solution to fix the connection and start printing.
Fixing Printer Connection Error on Windows 11
Each version of the Windows operating system comes with different settings. If you are experiencing this connection issue between a printer and a Windows 11 computer, it is crucial to learn the best solutions for Windows 11 devices. However, you are free to try the other available solutions.
But you may realize that not all solutions for other Windows versions can fix the connection error on your Windows 11 computer. Before trying the troubleshooting for other Windows versions, try these first and see whether these methods can fix the connection error on your devices.
1. Update the driver of your printer
If you ever connected your Windows 11 computer and the printer, check the version of the printer’s driver and then compare it with the latest driver from the official site of the printer company. To check the current printer driver version and then update the driver, follow these easy steps.
- Click that Windows button on the keyboard and then type Device Manager. Click Enter on your keyboard to run this menu.
- A list of all device types you connect to your computer will appear on a window. Click on the Print queues and then right-click on the printer you want to fix.
- Now click the Update driver option and you should choose a method to update the driver of your printer.
Simply choose search drivers automatically and wait for the computer to install the latest driver update. Restart your PC to fix this Windows cannot connect to the printer access is denied.
2. Update Windows

Your Windows computer is going to search for any available update and then download it automatically. When an update is ready, the power button on the screen is going to show you the option to Update & Shut Down and Update & Restart. But if the options aren’t available, try these.
- Click on the Start Menu on the screen of your Windows 11 computer and then move your cursor to the gear icon.
- Next, click Settings and then wait for the Settings window to appear on the screen.
- Click on the Windows Update option on the top right of the window and then click on the Check for updates
Make sure that your device connects to a stable network so that the download and installation processes won’t stop before it finally finishes. After updating your Windows, try to connect the computer and your printer again.
3. Restart the Windows 11 computer
Oftentimes, many issues and errors will be gone after a reboot or a restart. Many minor issues are caused by a software glitch and you can easily fix this glitch by rebooting the system. Before trying some other methods to fix the connection problem between a printer and a computer, follow these steps:
- Press the Windows button on your computer’s keyboard or click the Start Menu on the screen.
- Click the Power button but don’t select the Shut Down option since you don’t want to turn off the computer.
- Instead, click on the Restart button and then click OK to confirm your order. your Windows 11 will reboot.
While waiting for your Windows 11 computer to be ready, restart the printer you are trying to connect to. Rebooting both devices will make them ready to work again. If there is any minor issue, it will hopefully disappear after the reboot.
4. Remove unnecessary printer drivers
If you ever connected your Windows 11 computer to some different printers, there will be many printer drivers installed on the computer. This troubleshooting is going to fix a connection issue caused by the second reason on the previous list. Here are the steps to remove printer drivers you never use again.
- On the keyboard of your Windows 11 computer, press the Windows button and the R button together. Run window is going to appear on your screen now.
- And then type printmanagement.msc on the search bar before pressing the keyboard’s Enter
- On the Print Management window, click on the Print Servers, and then click your Desktop, and finally click the Drivers
- Right-click a printer driver and then click Delete to remove it. Repeat this step with any other driver you want to remove.
Before connecting the devices, restart the computer first. And then check whether this method can fix the unable-to-connect issue.
5. Remove the printer
When you disconnect a printer from your Windows 11 computer, the computer still has the data of that device. You need to remove this printer from your computer and then re-add it to fix the connection issue. To do this method, you only have to follow these easy steps.
- Click the Start Menu icon on the screen of your Windows 11 computer and then click Settings to run this menu.
- Now click on the Devices menu where you can find various sub-menu, but click on the Printers & Scanners
- Select a printer to remove and then some details of the printer will appear. Click on the Remove button to remove this device.
The final step will be clicking Yes and your Windows 11 computer is going to eliminate the printer from its data. Now, after removing the printer, you still have to re-add it to your computer and check the connection between both devices.
6. Re-add the printer to your Windows 11
After removing the printer, your Windows 11 computer is going to forget the previous connection with the printer. Now, you must add the printer again and start a fresh connection between both devices. Re-adding the printer is as easy as removing it from your Windows 11 computer.
- Click your computer’s Start Menu on the screen and run the Settings menu by clicking the gear icon.
- On the Settings window, click Bluetooth & Devices and then select the Printers & Scanners sub-menu.
- Click the Add a printer or scanner button and then you need to click Add device. Wait for the computer to scan any nearby printer.
To re-add the printer you removed, wait for your Windows 11 computer to finish the scanning process and then click on the printer you want to add. Click the Add device button and the printer should connect to your Windows 11 computer by now.
7. Remove the print spooler
A print spooler is a special Windows feature that enables assigning various jobs to your printer but the jobs won’t affect any system performance or application. This printer spooler is going to remove the need for any application until the printer finishes the printing process. To enable it, follow these steps:
- Open the Run window by pressing the R button and Windows button on your keyboard together.
- And then type control printers on the available column and then hit the Enter button on your keyboard.
- Right-click the printer you use on the tab of Devices and Printers and then click the Properties
- Click the Stop button under the running status of the print spooler or choose not to use the printer spooler. Click OK to apply the latest setting.
Restart the Windows 11 computer and you will see whether the connection issue between the computer and the printer is gone.
Windows Cannot Connect To The Printer Access Is Denied on Windows 7
Windows 11 is not the only version that experiences a connection error between the computer and the printer. The display of Windows 7 is nothing like Windows 11 so some methods above may not available on Windows 7 computers. Then you need some different methods to fix the error.
Before replacing the printer with a new printer just because of the connection error, you need to try some troubleshooting below. Fixing this connection error on Windows 7 computer is much easier than fixing the error on Windows 10 and Windows 11 computers. Here are the easy methods to try.
1. Manually add your printer
If your printer cannot connect to a Windows 7 computer, you must try adding the printer manually to fix the issue.
- Access the Control Panel on your Windows 7 computer and then open the Printer
- On the Printer window, click the Add Printers button and then add your local printer Instead of adding the local printer using TCP/IP, add the printer using a local port.
- Name the printer properly using the print server and the printer’s name. Your Windows 7 computer is going to ask you about the driver of the printer.
- Choose Hard Disk and then locate the driver of the printer you want to add to the computer. After installing the driver, close all running tabs.
Adding your printer manually will help you solve the connection error. It is also a brilliant idea to restart the computer before checking the connection between both devices after adding the printer manually.
2. Create another local port on the computer
Here is how to create a local port:
- Click the Start Menu button on the Windows 7 computer’s screen and then type Devices and Printers on the search bar.
- Access the Devices & Printers menu and then select Add a printer. Next, click on Add a local printer button and then choose Create a new port.
- Click on the dropdown menu next to the Type of Port option and then choose to Local Port and then type the Port name.
- Type the address of the printer and the name of your printer and then hit the OK button and the Next
- Choose the model of your printer and then start installing the driver of that printer. Click Next and click Have Disk and browse the location of the driver.
- After clicking OK, type the new printer’s name, click Next again and that’s it.
Close all tabs and restart the Windows 7 server computer before checking the connection issue.
3. Run Automated Printer Trouble-shooter
Microsoft Windows has special software for its loyal users, the name of this software is Automated Troubleshooting. People also know this software as a Printer Diagnostic software that will let you know what is wrong with the printer and how to fix any connection issue.
- Download the Microsoft software for free from this download link and then finish the software installation process.
- Access the Wizard section of the software and then troubleshoot the problem between your Windows 7 computer and a printer.
- Test the connection between both devices by clicking on the Add new printer button and wait for the troubleshooting to finish.
- You need to try re-adding your printer several times and when you’re done, close all tabs and everything should be ready.
Your printer may have some other minor issues and this connection issue is just the beginning. Microsoft’s trouble-shooter software will help you fix them all.
4. Share permissions to your printer
You may want to check the printer sharing permission on your Windows 7 computer. This way, other computers will be able to connect to your printer and no connection issue will block your computer from accessing the printer. These steps are going to help you allow the printer-sharing option.
- Access the File Explorer on your Windows computer and then open the Windows folder and access the system 32
- Next, open the spool folder and then right-click the PRINTERS folder and choose Properties.
- And then access the Sharing tab and then click the Advanced Sharing You need to check the option to Share this folder.
- Hit that OK button and then click the Apply button and your Windows 7 computer will save the new configuration.
Simply close all tabs and restart your computer and your Windows 7 computer should be able to share your printer with other computers with no connection issues.
A Universal Troubleshooting for All Windows Versions
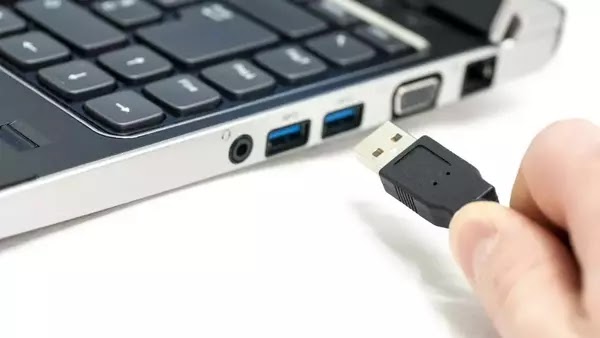
No matter what version of Windows you are using, there is troubleshooting to try. If you are trying to connect the printer using a cable, make sure that you plug all cables properly into the right port. The cables may not be plugged properly and cause connection issues between the two devices.
Those are the best solutions for Windows cannot connect to the printer access is denied you should try. Make sure that you always update the software and driver of any technology you are using. Fix the connection issue by yourself before taking your device to a service center.

I'm Morgan, the creator of VPNForMe — a site born from too many hours spent side-eyeing sketchy VPN reviews and buffering videos.
I wanted a place where people could get straight answers about privacy, streaming access, and which VPNs actually deliver — without the hype or tech jargon.