
If you're experiencing printing issues or want to ensure optimal performance from your remanufactured ink cartridge, you might need to reset it. However, the process can be confusing, especially if you're a first-time user.
In this comprehensive guide, we will walk you through the steps of resetting your remanufactured ink cartridge. Whether you have an issue with your cartridge or want to prevent problems, this guide will provide you with valuable insights.
Key Takeaways:
- Resetting your remanufactured ink cartridge can resolve many printer issues.
- Regular cleaning and maintenance are essential for optimal performance.
- The resetting process varies depending on your printer model and cartridge type.
- Make sure to check for error messages or indications of a problem before resetting.
- Understanding the compatibility and warranty aspects is essential before using remanufactured ink cartridges.
Understanding Remanufactured Ink Cartridges
Remanufactured ink cartridges are cartridges that have been recycled and refilled with new ink. They are often much cheaper than original cartridges and can be an eco-friendly alternative.
One of the benefits of remanufactured ink cartridges is that they are often compatible with a wider range of printers, including older models. They are also more environmentally friendly as they reduce the amount of non-biodegradable waste in landfills.
However, it's important to note that remanufactured ink cartridges may vary in quality and performance compared to the original cartridges they are replacing. They may produce prints of lower quality, and there may also be more chance of experiencing issues and errors.
When comparing remanufactured cartridges to the original ones, it's essential to consider various factors like price, quality, and compatibility, so you can make an informed decision.

It's also worth mentioning that some printer manufacturers discourage the use of remanufactured ink cartridges and may even void your printer's warranty if you use them. However, many consumers still prefer using remanufactured cartridges due to their cost-effectiveness and environmental benefits.
Common Issues with Remanufactured Ink Cartridges
While remanufactured ink cartridges offer an affordable and eco-friendly alternative to original cartridges, they are not without their problems. The most common issues faced by users of remanufactured cartridges include:
- Compatibility issues with printers
- Poor print quality
- Cartridge not recognized by the printer
- Ink leakage
- Ink running out faster than expected
These issues can be frustrating and cause disruptions in your printing tasks. Fortunately, many of these issues can be resolved by resetting your cartridge. Resetting the cartridge essentially restores it to the original state, which can often fix the problem.

It's important to note that not all problems can be solved by resetting the cartridge. If you have tried resetting your cartridge and the issue persists or if there are physical damages to the cartridge, it may be time to replace it.
Checking for Cartridge Errors
Before resetting your remanufactured ink cartridge, it's essential to identify and diagnose any potential cartridge errors. This can help you avoid unnecessary resets and ensure a smooth printing experience.
The most common error message you'll encounter with remanufactured cartridges is the “cartridge not recognized” error. This indicates that your printer cannot detect the cartridge and could be caused by several issues. It could be a defective cartridge, a dirty cartridge, or a compatibility issue.
Some printers may also display specific error codes, indicating the type of issue. It's crucial to refer to your printer manual or manufacturer website for more information on these codes.
If you're unsure whether your cartridge is exhibiting an error, you can perform a print head alignment test. A misaligned print head can cause ink cartridge errors and other printing problems. Follow these steps to perform a print head alignment test on your printer:
- Load plain paper into the tray
- Open your printer settings or control panel and select “Maintenance”
- Select “Print head alignment”
- Follow the on-screen prompts to complete the test
If the test fails, it may indicate an issue with your cartridge or printer. Refer to your printer manual or manufacturer website for troubleshooting tips.

The Resetting Process Explained
Resetting your remanufactured ink cartridge can help resolve many common printer issues and ensure optimal printing performance. In this section, we'll guide you through the step-by-step resetting process. The steps outlined below may vary depending on your printer model, so consult your printer manual or manufacturer's website for specific instructions.
Step 1: Remove the Cartridge
Before resetting the cartridge, remove it from the printer by following the manufacturer's instructions. Be sure to handle the cartridge carefully to avoid any damage or spills.
Step 2: Clean the Cartridge
Wipe the cartridge gently with a soft, lint-free cloth to remove any dust or debris. This step is crucial to ensure proper communication between the printer and the cartridge.
Step 3: Locate the Reset Button or Pinhole
Depending on your printer model, the reset button may be located on the cartridge itself or on the printer. If the reset button is not visible, look for a pinhole on the cartridge. Use a pin or paperclip to press the reset button or insert it into the pinhole.
Step 4: Hold the Button or Pin for 5-10 Seconds
Press and hold the reset button or pin for 5-10 seconds to allow the printer to recognize the cartridge. This will reset the ink level indicator and allow you to continue printing.
Step 5: Reinstall the Cartridge
After resetting the cartridge, carefully reinstall it into the printer by following the manufacturer's instructions.

Note: If you're unsure about any of the steps or encounter any issues during the resetting process, consult your printer manual or contact the manufacturer's support team for assistance.
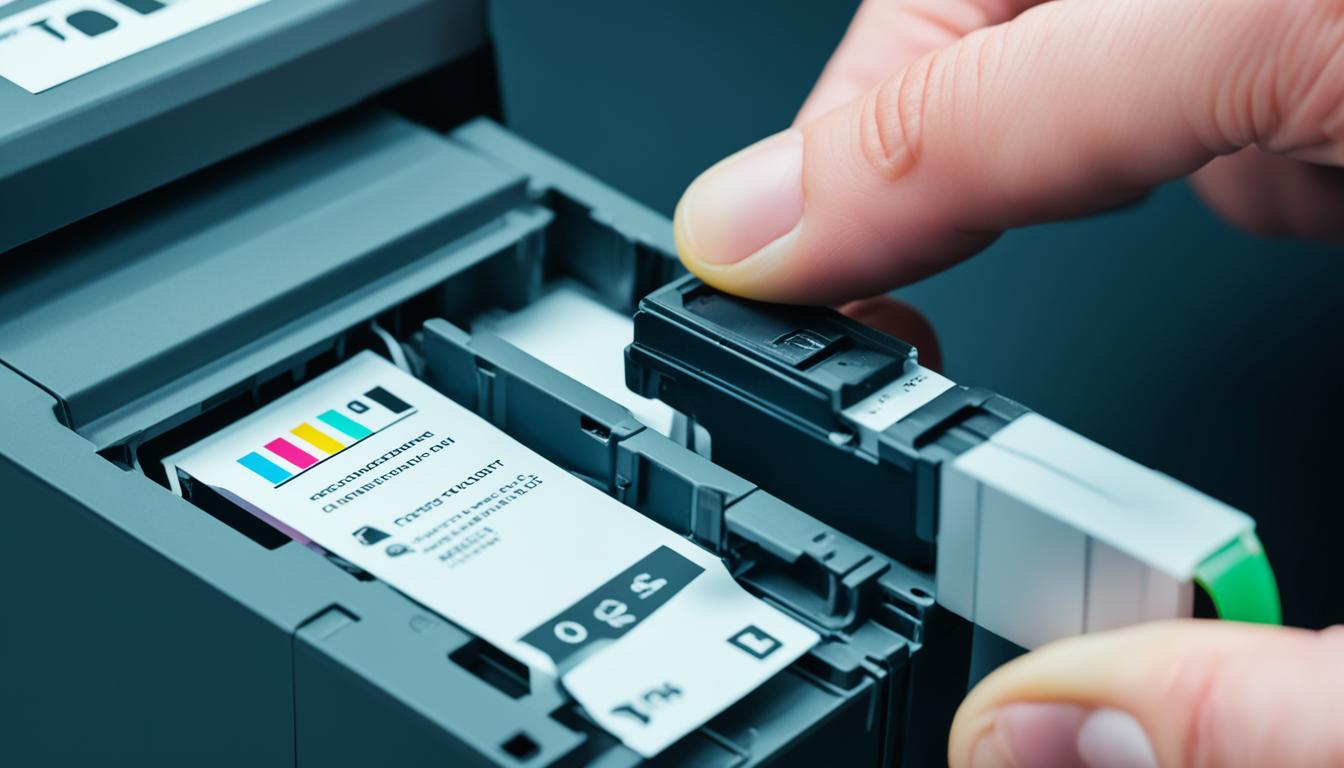
Manual Resetting Method
If your printer is not recognizing your remanufactured ink cartridge, you can try resetting it manually. This method is straightforward and only requires a few steps:
- Remove the remanufactured ink cartridge from your printer.
- Locate the cartridge contacts on the side or bottom of the cartridge. These will be either gold or silver in color.
- Using a clean, lint-free cloth, gently wipe the contacts to remove any dirt or debris.
- Reinsert the cartridge into your printer and run a test print to see if it is recognized.
If your printer still does not recognize the cartridge, you may need to try a different method, such as the chip resetting method or updating your printer's firmware.
Important Note:
Manual resetting should only be attempted if you are comfortable handling delicate electronic components. Mishandling or damaging the contacts can render the cartridge unusable. If you are unsure, consider seeking professional assistance.
For a visual guide on how to perform a manual reset, refer to the image below:

Chip Resetting Method
Remanufactured ink cartridges may not function correctly due to the chip needing to be reset. Follow these steps to reset your cartridge's chip:
- Turn off your printer and remove the remanufactured cartridge.
- Locate the chip on the cartridge and cover it with tape.
- Reinstall the cartridge and turn the printer on.
- Print a few pages, then turn off the printer and remove the cartridge again.
- Take the tape off the chip and reinstall the cartridge.
- Turn the printer on and print a test page to confirm the chip has been reset.
If the chip resetting method does not solve the problem, try other solutions like firmware updates or cleaning your cartridge.

Firmware Update Method
If your remanufactured ink cartridge is still not compatible after resetting manually or resetting the chip, updating your printer's firmware may help. Printer manufacturers release firmware updates occasionally to address compatibility issues and improve overall performance. Here are the steps to check for firmware updates:
- Visit the printer manufacturer's website and navigate to the support or download section.
- Find the firmware version currently installed on your printer by looking in the printer settings or on the printer control panel.
- Compare the current firmware version to the available firmware updates on the manufacturer's website to see if any updates are available for your printer model.
- Download the firmware update and follow the manufacturer's instructions for installation.
It's essential to follow the manufacturer's instructions closely as a wrong installation might cause serious problems. Once the firmware update is complete, test the printer with the remanufactured ink cartridge to ensure compatibility has been restored.
Cleaning and Maintenance Tips
To ensure optimal printing performance of your remanufactured ink cartridge, regular cleaning and maintenance are crucial. Here are some useful tips:
- Regularly clean the printhead to prevent ink buildup and clogging. Use a lint-free cloth and be gentle to avoid damaging the sensitive parts.
- Check for any leaks or spills and clean them immediately to avoid damage to your printer or cartridge.
- Store your unused cartridges in a cool, dry place, away from direct sunlight and heat. This can extend their shelf life and ensure better performance.
- Print at least once a week to prevent the ink from drying out and causing clogs. If you have not printed for a while, run a cleaning cycle before printing.
In addition to these basic cleaning and maintenance tips, it's also essential to use a quality cleaning kit designed specifically for ink cartridges. This can be a cost-effective way to keep your cartridges in top condition.
Finally, when handling cartridges, be gentle and careful to avoid any damage that can lead to reduced print quality or faulty performance. By regularly cleaning and maintaining your remanufactured ink cartridges, you can enjoy long-lasting and high-quality prints.

Troubleshooting Other Printing Problems
If resetting your remanufactured ink cartridge did not solve the printer issue, it is possible that there are other underlying issues causing printing difficulties. Do not worry, as many printing problems have simple fixes that you can do without having to call a technician. This section covers some of the common printing problems and their troubleshooting steps.
Printer not Recognizing Cartridge
If your printer is not recognizing the cartridge, the first step is to ensure that the cartridge is installed correctly. Try removing and reinstalling the cartridge, making sure that it clicks firmly in place. If this does not work, clean the cartridge contacts and the printer contacts with a lint-free cloth. If the problem persists, replace the cartridge with a new one.
Poor Print Quality
If your prints are coming out blurry or smudged, the first thing to do is to check the ink levels. If the levels are low, replace the cartridge with a new one. If the ink levels are sufficient, clean the printhead using the printer's cleaning utility. Some printers also have a deep cleaning option that you can try for more stubborn clogs.
Paper Jams
Paper jams can be frustrating, but they are also one of the most common printing problems. Check that the paper is loaded correctly and that the tray is not overfilled. If the paper is crumpling or curling, try using a fresh, dry stack. If the problem persists, try cleaning the rollers using a soft cloth and some warm water.
Pro Tip: To avoid paper jams, ensure that the paper is stored in a cool and dry place and is not exposed to direct sunlight or moisture.
Slow Printing
If your printer is taking too long to print, check that it is connected to your computer or network correctly. Make sure there are no pending print jobs in the queue that could be slowing it down. Also, check that your printer's settings are optimized for speed by switching to draft or fast printing mode if possible.

By following the steps outlined in this section, you can resolve many common printing problems. However, if the problem persists, it is always better to seek professional help rather than cause further damage.
Printer Compatibility and Warranty Considerations
While remanufactured ink cartridges can be a cost-effective alternative to original cartridges, it's essential to ensure that your printer is compatible with them. Not all printers are designed to work with remanufactured ink cartridges, and using them might result in printer damage or poor print quality. To avoid any compatibility issues, double-check the printer's manual before purchasing remanufactured cartridges.
It's also important to note that using remanufactured ink cartridges might void the printer's warranty. Manufacturers often decline warranty claims if the printer is damaged due to the use of third-party cartridges. However, the Federal Trade Commission (FTC) issued a warning stating that it's illegal for manufacturers to impose such conditions on the use of third-party cartridges. So, even if the manufacturer denies a warranty claim, you might still have legal recourse to challenge their decision.
| Printer Brand | Compatible with Remanufactured Cartridges | Warranty Implications |
|---|---|---|
| HP | Yes | Warranty can be voided if damage is caused by remanufactured cartridges |
| Canon | Yes | Warranty can be voided if damage is caused by remanufactured cartridges |
| Epson | Yes | Warranty can be voided if damage is caused by remanufactured cartridges |
| Brother | Yes | Warranty can be voided if damage is caused by remanufactured cartridges, but FTC warning applies |
| Xerox | Yes | Warranty can be voided if damage is caused by remanufactured cartridges, but FTC warning applies |
Keep in mind that using remanufactured ink cartridges has its pros and cons, so it's essential to consider the compatibility and warranty implications carefully. If your printer is compatible with remanufactured cartridges, make sure to perform regular maintenance and resetting as outlined in this guide for optimal printing performance.
Conclusion
Resetting your remanufactured ink cartridge doesn't have to be a daunting task. It can be a simple solution to many printer issues and can save you money in the long run. Don't let the fear of technical jargon or complicated steps hold you back from trying it out.
Remember to regularly maintain and clean your ink cartridge to ensure optimal performance. If you encounter any problems, be sure to troubleshoot and consider other potential issues beyond the cartridge itself.
When it comes to printer compatibility and warranty, do your research and be aware of any implications before purchasing and using remanufactured cartridges or resetting them.
Overall, resetting your remanufactured ink cartridge can be a cost-effective and environmentally-friendly way to enjoy smooth and hassle-free printing. We hope this comprehensive guide has been helpful in walking you through the resetting process and understanding the basics of remanufactured cartridges. Happy Printing!

I'm Morgan, the creator of VPNForMe — a site born from too many hours spent side-eyeing sketchy VPN reviews and buffering videos.
I wanted a place where people could get straight answers about privacy, streaming access, and which VPNs actually deliver — without the hype or tech jargon.