Printing on glossy paper can elevate the quality of your prints, giving them a professional and polished look. However, one common challenge that arises when working with glossy paper is the issue of ink spreading or smearing, which can significantly detract from the final result. But fear not! There are several effective techniques you can employ to prevent ink from spreading on glossy paper, ensuring that your prints remain crisp, vibrant, and smudge-free.
So, whether you’re printing photographs, brochures, or any other documents on glossy paper, we’ve got you covered. In this article, we will explore the causes of ink smearing on glossy paper, provide valuable tips on adjusting printer settings, selecting the right paper and ink, allowing adequate drying time, and even using sealants for added protection. By implementing these tips and tricks, you’ll be well-equipped to overcome the challenges associated with printing on glossy paper and achieve exceptional print quality.
Key Takeaways:
- Adjusting printer settings is crucial to prevent ink smearing on glossy paper.
- Choose glossy photo paper specifically designed for inkjet printers to achieve optimal results.
- Allow sufficient drying time for your prints to minimize the risk of smudging.
- Consider using sealants to provide an extra layer of protection against smudging.
- Regular printer maintenance and choosing compatible paper and ink are essential for smudge-free prints.
Understanding the Causes of Ink Smearing on Glossy Paper
When it comes to printing on glossy paper, encountering ink smearing can be frustrating. Understanding the causes of ink smearing on glossy paper is essential for addressing the issue and preventing it from happening. Let’s take a closer look at the primary factors that contribute to ink smearing on glossy paper.
Incorrect Printer Settings
One common cause of ink smearing is using incorrect printer settings, such as selecting the wrong paper type. When the printer is not configured to match the glossy paper you are using, it can result in ink spreading or smudging on the paper’s surface.
To prevent ink smearing, double-check your printer settings and ensure that the paper type selected in the printer preferences matches the glossy paper you are using.
Incompatible Paper Types
Using incompatible paper types can also lead to ink smearing on glossy paper. Different types of paper have varying coating and absorption properties. Using paper that is not specifically designed for inkjet printers or glossy finishes can result in poor ink adhesion and subsequent smudging.
Always opt for glossy photo paper specifically designed for inkjet printers to minimize the risk of ink smearing.
Low-Quality Ink
The quality of the ink you use can significantly impact the occurrence of ink smearing on glossy paper. Low-quality ink may not dry properly or adhere well to the paper’s surface, leading to smudging and spreading.
Investing in high-quality ink cartridges that are compatible with your printer model is crucial for achieving smudge-free prints on glossy paper.
Dirty Print Heads
Dirty print heads can also contribute to ink smearing on glossy paper. When the print heads are clogged or contaminated with dried ink or debris, it can result in uneven ink distribution and smudging.
Regularly clean the print heads of your printer to maintain their performance and prevent ink smearing on glossy paper. Follow the manufacturer’s instructions for proper cleaning techniques.
Exposure to Moisture or Water
Exposure to moisture or water can cause ink to smear on glossy paper. Humidity in the air or accidental contact with water or liquid can disrupt the ink’s drying process and lead to smudging.
It is essential to store your glossy paper and prints in a dry environment, away from any potential sources of moisture. Additionally, handle prints with dry hands to prevent any transfer of moisture.
By understanding the causes of ink smearing on glossy paper and implementing the appropriate preventive measures, you can ensure that your prints come out sharp and smudge-free.
Adjusting Printer Settings to Prevent Ink Smearing
When it comes to printing on glossy paper, adjusting your printer settings is crucial in preventing ink smearing and ensuring high-quality prints. By making a few simple tweaks, you can achieve sharp and smudge-free results. Here are some key steps to follow:
- Select the correct paper type: In your printer preferences, ensure that you choose the appropriate paper type that matches the glossy paper you are using. This setting helps the printer optimize ink application and drying time.
- Adjust print quality: Setting the print quality to a higher setting can enhance ink adherence to the glossy paper. Opt for a higher print resolution for sharper and more vibrant prints.
- Download the latest printer driver: If you don’t see the necessary options in your printer’s settings, consider downloading the latest printer driver from the manufacturer’s website. This ensures that you have access to all the available settings and functionalities.
Pro Tip: Always refer to your printer’s user manual for specific instructions on adjusting settings for glossy paper printing. Each printer model may have unique features and settings.
By adjusting your printer settings according to the paper type and optimizing the print quality, you can significantly reduce the risk of ink smearing on glossy paper. Now let’s explore other techniques to achieve impeccable prints on glossy paper.
Printer Settings for Glossy Paper Printing
| Printer Setting | Adjustment |
|---|---|
| Paper Type | Select the appropriate glossy paper type |
| Print Quality | Set to a higher resolution for better ink adherence |
| Color Management | Ensure color profiles are accurate for vibrant prints |
| Printer Driver | Download the latest version for full functionality |
Refer to your printer’s user manual for specific instructions on accessing and adjusting these settings.
Choosing the Right Paper and Ink for Smear-Free Printing
When it comes to printing on glossy paper, selecting the appropriate paper and ink is essential to achieve smear-free prints. Your choice of paper and ink can significantly impact the quality and durability of your prints, as well as prevent ink smudging. To ensure optimal results, consider the following tips:
Choose the Right Paper
When printing on glossy paper, it’s crucial to use paper specifically designed for inkjet printers. Glossy photo paper is specially coated to enhance color vibrancy and ink absorption, resulting in sharper, more vibrant prints. Laser printer paper is not recommended for inkjet printers, as it can cause smearing and result in subpar print quality. By choosing the right paper, you can ensure that the ink adheres properly to the surface and prevents smudging.
Select High-Quality Ink
Investing in high-quality ink cartridges that are compatible with your printer model is essential for achieving smear-free prints. Poor quality ink can impact drying time, leading to smudging and blurry prints. Trusted brands offer inks specifically formulated for glossy paper, providing better color accuracy and faster drying times. By choosing the right ink, you can ensure that it adheres properly to the glossy surface and produces crisp, smudge-free prints.
Consider Pigment-Based Inks
Inkjet printers typically use dye-based inks, which may be prone to smudging on glossy paper. Consider upgrading to a pigment-based inkjet printer, as pigment inks offer superior water resistance and are less likely to smear. Pigment-based inks create a vibrant, long-lasting result that won’t blur or fade easily. While pigment-based inks may come at a slightly higher price point, their added durability and smear resistance make them an ideal choice for printing on glossy paper.
Perform Compatibility Checks
Before printing on glossy paper, ensure that the paper and ink you choose are compatible with your printer model. Consult your printer’s manual or the manufacturer’s recommendations to determine the ideal paper and ink options. Using incompatible paper or ink can lead to smearing and poor print quality. Upgrading to advanced paper types with special coatings can also enhance ink adhesion and minimize the risk of smudging on glossy paper.
| Paper Type | Pros | Cons |
|---|---|---|
| Glossy Photo Paper | Enhanced color vibrancy | Requires longer drying time |
| Laser Printer Paper | Quick drying time | Prone to smudging on inkjet printers |
By following these suggestions and selecting the right paper and ink for your printing needs, you can achieve smear-free prints on glossy paper. Remember to always check compatibility, invest in high-quality ink cartridges, and consider pigment-based inks for optimum results. With the right combination of paper and ink, you can enjoy professional-quality prints that are free from smudges and deliver exceptional clarity and detail.

Give Ink Enough Time to Dry for Smudge-Free Prints
Allowing sufficient drying time for your prints is essential to prevent smudging on glossy paper. The drying time can vary depending on the printer, ink, and paper type. Research the recommended drying time and avoid handling the prints too soon. Photo prints may require up to 24 hours to fully dry. By giving the ink enough time to dry, you can minimize the risk of smudging and achieve crisp prints on glossy paper.
If you’re unsure about the recommended drying time for your specific printer and ink combination, refer to the printer’s manual or the manufacturer’s website for guidance. Alternatively, you can perform a quick online search or reach out to the printer manufacturer’s customer support for more information. Taking the time to understand the drying requirements will ensure that your prints are smudge-free and ready for display or framing.
While waiting for the ink to dry, it’s important to handle the prints with care. Avoid touching the printed surface, as oils from your fingers can transfer onto the ink and potentially lead to smudges. Handle the prints by their edges or use gloves to prevent any accidental contact with the ink.
“Giving the ink enough time to dry is a crucial step in achieving smudge-free prints on glossy paper. Rushing the process can lead to unsightly smears and jeopardize the quality of your prints. Patience is key when it comes to successful printing on glossy paper.”
Additionally, consider dedicating a designated drying area for your prints. Choose a clean, dust-free space with good ventilation to allow the ink to dry properly. Avoid placing the prints in areas with high humidity or direct sunlight, as these conditions can prolong the drying time or even cause the ink to reactivate and smudge. It’s best to lay the prints flat on a clean, dry surface to ensure even drying.
To keep track of the drying progress, you can mark the back of each print with a timestamp or note down the printing time. This way, you’ll have a clear indication of when the prints are ready for handling or further processing. Remember that the drying time can be influenced by factors such as ink saturation, paper thickness, and room temperature. Adjust your expectations accordingly and allow for the necessary time for the ink to fully dry.
Summary:
Proper drying time is crucial for achieving smudge-free prints on glossy paper. Give the ink enough time to dry by researching the recommended drying time for your specific printer and ink combination. Handle the prints with care to avoid transferring oils and smudging the ink. Create a designated drying area with good ventilation, and avoid high humidity or direct sunlight. Mark the back of each print with a timestamp or note to keep track of the drying progress. By giving the ink sufficient drying time, you can ensure that your prints on glossy paper are crisp, vibrant, and smudge-free.
Using Sealants to Protect Prints from Smudging
When it comes to preserving the quality and longevity of your prints on glossy paper, sealants play a crucial role. Applying sealants to the surface of your prints creates a protective barrier that shields against smudging and moisture damage, ensuring that your prints remain pristine for years to come.
There are various sealant options available in the market, each offering unique benefits and application methods. Clear sprays specifically designed for protecting prints can be easily applied in a controlled manner, providing an even and consistent protective layer. These sprays are available in matte, gloss, or satin finishes, allowing you to choose the look that best complements your prints.
Art protectants, commonly used by professional photographers and artists, are another sealant option. These protectants are specially formulated to safeguard prints and prevent smudging. They are often available in liquid form, which allows for precise application with a brush or sponge.
If you’re looking for a DIY approach, everyday items like polyurethane, nail polish, or hairspray can also serve as effective sealants. Apply these substances sparingly and evenly using a brush or spray bottle to create a protective layer over your prints.
After applying the sealant, allow it sufficient time to dry completely before handling the prints. The drying time required may vary depending on the type of sealant used, so consult the product instructions for guidance.
Advantages of Using Sealants:
- Protection against smudging: Sealants form a barrier that prevents ink from coming into contact with moisture, reducing the chances of smudging on glossy paper.
- Preserves print quality: By preventing ink from spreading and smudging, sealants help maintain the sharpness and vibrancy of your prints.
- Longevity: Sealants enhance the durability and longevity of your prints by offering protection against external elements.
- Versatile application: With a wide range of sealant options available, you can choose the one that best suits your preferences and printing requirements.
Remember, it’s essential to test sealants on a small, inconspicuous area before applying them to your entire print. This allows you to ensure compatibility and achieve the desired result without compromising your valuable prints.
Comparative Table: Sealant Types
| Sealant Type | Application Method | Finish | Drying Time |
|---|---|---|---|
| Clear sprays | Easy spray-on application | Matte, gloss, or satin | Varies by product |
| Art protectants | Brush or sponge application | Varies by product | Varies by product |
| Polyurethane | Brush or spray bottle application | Clear | Varies by product |
| Nail polish | Brush application | Glossy | Varies by product |
| Hairspray | Brush or spray bottle application | Varies | Varies |
Choosing the right sealant for your prints can depend on personal preference, desired finish, and specific application requirements. Experiment with different sealants and techniques to find the one that best suits your needs, ensuring that your precious prints remain protected and smudge-free on glossy paper.
Regular Printer Maintenance for Smudge-Free Printing
Maintaining your printer regularly is essential for achieving smudge-free prints on glossy paper. By following these maintenance tips, you can ensure that your printer operates optimally and produces high-quality prints.
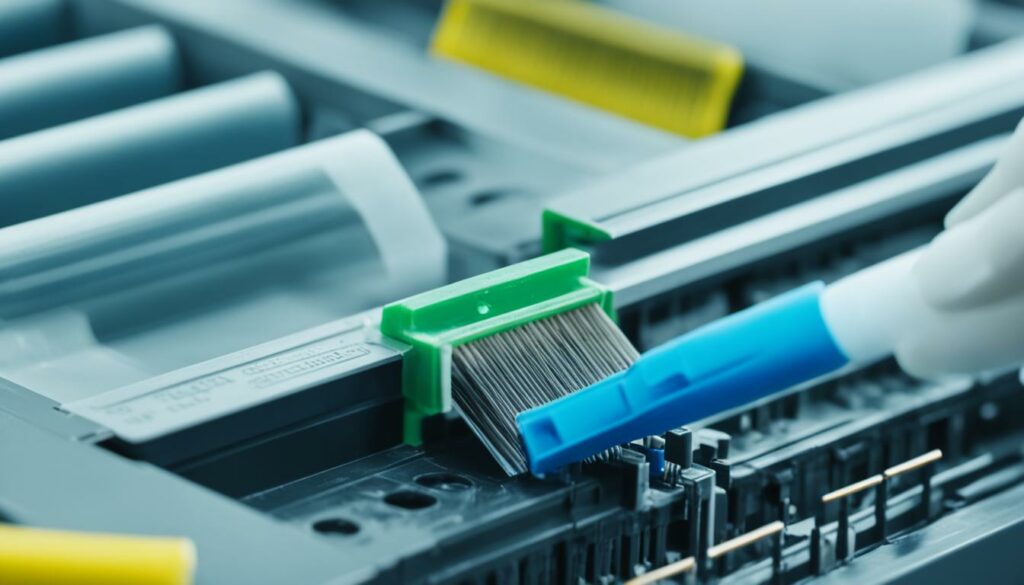
1. Clean the print head:
A clogged print head can lead to ink smudging. Consult your printer’s manual for instructions on how to clean the print head properly. Regularly cleaning the print head removes any ink buildup and improves print quality.
2. Check inkpad or maintenance box:
Ensure that the inkpad or maintenance box is not full or near its capacity. If it is, replace it with a new one. Overfilled inkpads can cause excess ink to spread, resulting in smudged prints.
3. Dust off rollers and transfer belts:
Dust and dirt on the rollers or transfer belts can also contribute to print smudging. Use a microfiber cloth or a soft brush to gently clean these components, ensuring they are free from debris that may transfer onto the paper.
Regular printer maintenance will help keep your printer in optimal condition, reducing the likelihood of smudged prints on glossy paper.
Best Practices for Printer Maintenance:
Here are some additional tips to keep your printer running smoothly:
1. Use high-quality ink cartridges: Opt for reputable ink cartridge brands that are compatible with your printer. Low-quality ink can lead to poor print quality and smudging.
2. Keep the printer in a clean environment: Avoid exposing the printer to dusty or humid conditions, as these can affect print quality. Regularly dust the printer and keep it in a well-ventilated area.
3. Align the printer: Periodically aligning the printer ensures accurate ink placement and reduces the risk of smudging. Most printers have an alignment function accessible through the printer settings menu.
By incorporating these maintenance practices into your printing routine, you can enjoy smudge-free prints on glossy paper consistently.
| Printer Maintenance Checklist | Frequency |
|---|---|
| Clean the print head | Monthly |
| Check inkpad or maintenance box | As needed |
| Dust off rollers and transfer belts | Bi-monthly |
Considering Pigment-Based Inkjet Printers for Smear Resistance
If you frequently experience ink smearing on glossy paper and want a more permanent solution, it may be time to consider upgrading to a pigment-based inkjet printer. Pigment inks are specially formulated to offer superior durability and smear resistance on glossy surfaces. Unlike dye-based inks commonly used in inkjet printers, pigment-based inks contain tiny solid particles that adhere to the paper more effectively, resulting in prints that are less likely to smudge or smear.
One of the main advantages of pigment-based inkjet printers is their exceptional water resistance. The solid pigments in these inks form a protective layer on the paper, preventing water from penetrating and causing smearing. This makes pigment-based inkjet printers an ideal choice for prints that may come into contact with moisture, such as photographs, brochures, or marketing materials.
Additionally, pigment-based inks offer excellent fade resistance, ensuring that your prints retain their vibrant colors and sharp details for a long time. This is especially important if you plan to display your prints or if they will be exposed to direct sunlight.
While pigment-based inkjet printers have numerous benefits, it’s important to note that they may have slightly different printing characteristics compared to dye-based printers. Pigment inks tend to have a slightly narrower color gamut, which means they may not produce the same range of vibrant colors as dye-based inks. However, for most professional and everyday printing needs, the color accuracy and longevity of pigment-based inks make them an excellent choice.
The Advantages of Pigment-Based Inkjet Printers:
- Superior durability and smear resistance on glossy paper
- Excellent water resistance for prints exposed to moisture
- Enhanced fade resistance for long-lasting prints
- Higher color accuracy and longevity compared to dye-based inks
If you’re still experiencing smudging issues even with pigment-based inkjet printers, another alternative to consider is laser printing. Laser printers use toner, a powdered ink that gets fused onto the paper using heat. This method eliminates the risk of smudging entirely and is commonly used for high-volume text or graphic printing.
By choosing a pigment-based inkjet printer or exploring laser printing options, you can significantly reduce the chances of smudging and achieve professional-quality prints on glossy paper.
Choosing High-Quality Inks for Smudge-Free Prints
When it comes to achieving smudge-free prints on glossy paper, opting for high-quality inks is paramount. While it may be tempting to choose cheaper, off-brand ink cartridges, doing so can result in inferior print quality and increased smudging. Investing in trusted and reliable ink cartridges that are compatible with your printer model is essential for obtaining flawless prints.
High-quality inks offer numerous advantages when printing on glossy paper. They provide better color accuracy, ensuring that your prints reflect the true vibrancy of your images. Additionally, high-quality inks have faster drying times, reducing the risk of smudging during the printing process. Furthermore, these inks offer improved adhesion properties specifically designed for glossy paper, resulting in sharp and smudge-free prints.
When selecting ink cartridges for your printer, consider reputable brands known for producing high-quality inks. Brands such as Epson, Canon, and HP are widely recognized for their commitment to producing superior printing products. Research the specific ink cartridges compatible with your printer model and choose from the range of options available to find the best match for your printing needs.
Benefits of High-Quality Inks
- Enhanced color accuracy for vibrant prints
- Faster drying times, minimizing the risk of smudging
- Improved adhesion to glossy paper for smudge-free results
- Reliable performance and compatibility with your printer
“Investing in high-quality inks not only ensures better print quality but also reduces the frustration of dealing with smudging on glossy paper.” – Jane Thompson, Professional Photographer
By prioritizing high-quality inks, you can elevate the quality of your prints and avoid the disappointments that come with smudging on glossy paper. Remember to follow the manufacturer’s instructions for installing and replacing ink cartridges to maintain optimal print performance.
| Brand | Compatible Printer Models |
|---|---|
| Epson | EcoTank ET-3760, WorkForce Pro WF-4740 |
| Canon | Pixma TR8520, imageCLASS MF743Cdw |
| HP | OfficeJet Pro 9025e, ENVY Photo 7855 |
The Importance of Using Compatible Paper and Ink
When it comes to preventing smudging on glossy paper, using compatible paper and ink is of utmost importance. By ensuring that you are using the appropriate paper and ink for your printer model, you can achieve high-quality, smudge-free prints.
Consulting your printer’s manual or the manufacturer’s recommendations is a great starting point to determine the right combination of paper and ink for your printing needs. Using the wrong combination can lead to smearing and poor print quality, which can be frustrating and wasteful.
Upgrading to advanced paper types with special coatings is another effective way to enhance ink adhesion and resistance to smudging on glossy paper. These specialized coatings create a smooth surface that allows the ink to adhere better, resulting in sharp and vibrant prints without smudges or smears.

By using compatible paper and ink, you can guarantee consistent and reliable results every time you print on glossy paper. Remember to always follow the manufacturer’s recommendations and choose high-quality products to ensure optimal performance and prevent smudging.
Heat Setting or Proper Drying for Glossy Paper Prints
When it comes to printing on glossy paper, heat setting or proper drying is crucial to ensure that the ink sets properly and prevents smudging. There are a few methods you can use to achieve this.
Heat Setting:
After printing your artwork or photographs on glossy paper, you can gently heat the print to speed up the drying process. One option is to use a lamp by placing it a few feet away from the print, allowing the heat to gradually dry the ink. Alternatively, you can use a hairdryer on the lowest heat setting and hold it approximately six inches away from the paper. Remember to keep the hairdryer in constant motion to avoid overheating and damaging the paper.
Proper Drying:
If you prefer not to use heat, allowing the prints to naturally dry is another effective method. Ensure that the prints are placed in a high-temperature and low-humidity environment to facilitate faster drying. This can be a room with controlled temperature and humidity levels or using a dehumidifier. Avoid stacking prints on top of each other during the drying process to prevent any potential smudging.
Using either of these methods, heat setting or proper drying, will help prevent smudging and ensure that your glossy paper prints turn out sharp and flawless.

Now that you understand the importance of heat setting or proper drying, let’s explore additional techniques to enhance the quality of your glossy paper prints.
Conclusion
Printing on glossy paper can be challenging, but with the right tips and tricks, you can achieve professional-looking prints while preventing ink spread. By adjusting your printer settings, choosing the right paper and ink, giving the ink sufficient drying time, using sealants, and performing regular maintenance, you can minimize smudging on glossy paper.
Remember to adjust your printer settings to match the glossy paper you are using. Use the appropriate paper type and invest in high-quality ink cartridges that are compatible with your printer model. Give your prints enough drying time to prevent smudging, and consider using sealants to add an extra layer of protection. Regularly maintain your printer to ensure optimal performance and prevent any potential smudging issues.
By following these tips and tricks, you can master the art of printing on glossy paper and enjoy flawless results. With proper techniques and care, you can prevent ink spread, achieve sharp prints, and create professional-quality materials on glossy paper.
Source Links
- https://www.inkjetwholesale.com.au/blog/printer-education/how-to-prevent-inkjet-smearing/
- https://www.prettypartyandcrafty.com/stop-ink-from-smearing-glossy-paper/
- https://www.reddit.com/r/RAoC_meta/comments/cb7u9l/how_do_you_guys_keep_ink_from_smearing_on_shiny/

Morgan Azhari, the owner of PrinterUpdate.net, is a dedicated expert in the field of printers, leveraging a wealth of experience and education to create a platform that passionately shares insights and solutions.
With a goal to enhance the printer user experience, my vision for the website is to provide valuable content, making a positive impact on individuals navigating the complexities of printers.
