How to Scan Using My Image Garden
In this section, we will guide you through the step-by-step scan process using Canon My Image Garden. Whether you want to scan documents, photos, or other items, My Image Garden provides a user-friendly interface to ensure a seamless scanning experience.
To begin, make sure that your Canon scanner or printer is turned on and connected to your computer. Place the item you want to scan on the platen, ensuring that it is aligned correctly.
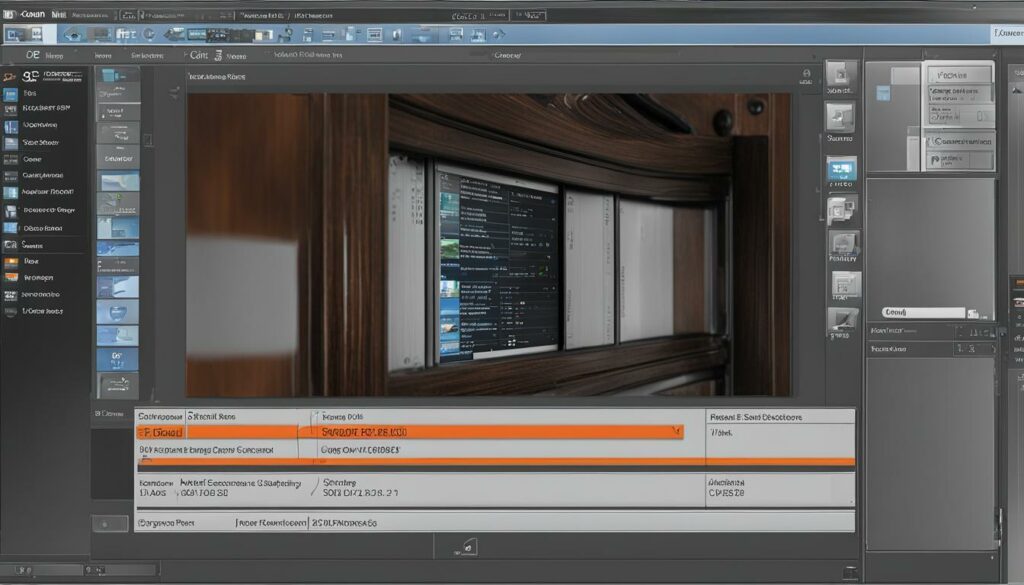
Next, open the My Image Garden software on your computer. You can navigate to it from the Start menu or taskbar.
Once My Image Garden is open, click on the “Scan” option in the main interface. This will switch the view to the Scan window.
Within the Scan window, you will see various scanning options. To perform a standard scan, click on the “Auto” option. This will automatically detect the item on the platen and initiate the scanning process.
As the scan progresses, you will be able to view the status and progress in real-time. Once the scan is complete, the scanned image will appear as a thumbnail in the My Image Garden interface.
If necessary, you can further adjust the scanned image. My Image Garden provides options to rotate or crop the image to suit your needs.
Finally, save the scanned image to your desired location on your computer. You can also choose to print the scanned image directly from within My Image Garden.
Scanning with Canon My Image Garden is a straightforward process that allows you to easily digitize your documents and photos. The software provides a user-friendly interface and a range of features to enhance your scanning experience.
Now that you know how to scan using My Image Garden, let's explore other scanning options and techniques to make the most of your Canon device.
Scan Using Quick Menu
Quick Menu is utility software provided by Canon that makes scanning easy from your Windows or Mac computer.
To get started with Quick Menu, simply click on the Quick Menu icon on your computer.
Within the Main Menu, you will find a range of scan options, including Auto Scan, Photo Scan, Document Scan, Custom Scan, and ScanGear.
To initiate a scan, just click on the scan option that best suits your needs.
If you want to adjust the scan settings, you can easily do so by selecting “Scan Settings” from the Main Menu.
Once the Scan Settings window opens, you can customize various parameters according to your requirements.
Remember to click “OK” to save your settings before starting the scan.
Your scan will then begin with the selected settings, providing you with a quick and hassle-free scanning experience.
Once the scan is complete, the scanned document will be saved to your desired location.
Additionally, Quick Menu offers more than just scanning functions. You can also use it to access online product information and run slideshows of images, providing you with a comprehensive tool for managing your Canon scanning needs.
Enhance your scanning workflow with Canon Quick Menu, and enjoy quick access to scanning functions at your fingertips.
Using the Machine as a Scanner

Are you looking to convert your paper documents into electronic files? With a Canon machine scanner, you can easily digitize your documents and save them in various file formats such as PDFs. Whether you prefer using the machine's operation panel or an application on your computer, scanning has never been easier.
Before you start scanning, make sure you have completed the necessary software installations and configurations. This ensures that your Canon machine is ready to serve as a scanner.
If you choose to scan directly from the machine's operation panel, follow these easy steps:
- Place your original document on the machine's platen.
- Access the scanning function on the operation panel.
- Choose the desired scan settings, such as resolution and file format.
- Initiate the scan and wait for the process to complete.
- Once the scan finishes, you can save the scanned document to your preferred location.
Alternatively, you can scan documents placed on the machine from a computer by using applications like MF Scan Utility. This provides additional flexibility and control over the scanning process. To scan from a computer using applications:
- Ensure that your Canon machine is connected to your computer via USB or a network connection.
- Install the necessary software and drivers for your Canon machine, following the instructions provided in the User's Guide or MF Driver Installation Guide from the Canon website.
- Open the scanning application, such as MF Scan Utility, on your computer.
- Select your Canon machine as the scanning device within the application.
- Configure the desired scan settings, including resolution and file format.
- Start the scan and wait for the process to complete.
- After the scan finishes, you can save the scanned document to your desired location on your computer.
To maximize your scanning experience and understand the complete functionalities of your Canon machine, refer to the User's Guide or consult the Canon website for comprehensive installation and usage instructions.
| Advantages of Using the Machine as a Scanner | Machine Compatibility |
|---|---|
|
|
By utilizing the capabilities of your Canon machine scanner, you can streamline your document management processes and create electronic files that are easily searchable and shareable. Whether you need to digitize important records, receipts, or business documents, the Canon machine scanner offers a user-friendly and efficient solution.
Scanning from the Machine
When it comes to scanning documents, your Canon machine offers a convenient and efficient solution. With just a few simple steps, you can easily scan your documents directly from the machine's operation panel.
Here's how to scan documents from your Canon machine's operation panel:
- Place the document you want to scan on the machine.
- Press the “COPY/SCAN” button on the machine to switch to the Scan mode screen.
- Use the navigation buttons to select the desired scan settings, including the destination computer.
- Choose the scan type, such as color scan or black and white scan.
- Start the scan by pressing the corresponding button on the machine.
- The scanned document will be saved to the selected computer.
If you have multiple pages to scan, simply follow the instructions provided by the machine to complete the scanning process.
By default, the scanned data is saved to the “My Documents” folder on your computer. However, if you prefer a different save destination, you can easily change it using the MF Scan Utility.
Scanning from a Computer

To scan documents from your computer using a Canon scanner, you can utilize the MF Scan Utility software. Follow these steps to scan and save your documents:
- Open the MF Scan Utility on your computer.
- Place the document you want to scan on the machine.
- Use the MF Scan Utility to initiate the scan.
- Select the desired scan settings, including the scan type, resolution, and file format.
- Start the scan using the MF Scan Utility.
- The scanned document will be saved to your computer.
- If you have multiple pages to scan, follow the instructions provided by the MF Scan Utility to complete the scanning process.
- By default, the scanned data is saved to the “My Documents” folder, but you can change the save destination from the MF Scan Utility.
With the MF Scan Utility, you have the flexibility to customize your scanning experience and save scanned documents to your preferred location on your computer.
| Scan Setting | Description |
|---|---|
| Scan Type | Select whether you want to scan in color, grayscale, or black and white. |
| Resolution | Choose the level of detail and clarity for your scanned document. |
| File Format | Specify the format in which you want to save the scanned document, such as PDF or JPEG. |
“The MF Scan Utility provides a user-friendly interface, allowing you to effortlessly scan documents directly from your computer. With the ability to customize scan settings and choose your preferred file format, it offers convenience and flexibility for your scanning needs.”
Scanning Using Scan Utility
If you're looking for a versatile and efficient way to scan your documents, Canon Scan Utility is the solution you need. This powerful software allows you to scan your documents or images directly from your computer with ease.
To get started, you'll first need to install the MF Scan Utility. You can find it on the supplied DVD-ROM or download the latest version from the Canon website. Once installed, open the MF Scan Utility on your computer.
Using MF Scan Utility, you have the flexibility to scan documents or images and specify the desired application or email to forward the scanned data. It's a convenient and time-saving feature that streamlines your scanning process.
Follow the step-by-step instructions provided in the MF Scan Utility to complete your scanning process. The software offers various advanced scan settings, allowing you to customize your experience and achieve the desired results.
If you need more information on using the MF Scan Utility, refer to the instructions within the utility itself or consult the Help section for detailed guidance.
Configuring Scan Settings in ScanGear MF

ScanGear MF is a powerful scanner driver included with your Canon machine. It offers a range of advanced scan settings and customization options, allowing you to optimize your scanning experience. Whether you need precise color reproduction, higher resolution, or specific file formats, ScanGear MF has got you covered. Here's how you can configure scan settings using ScanGear MF:
- Start ScanGear MF from either the MF Scan Utility or a compatible scanning application on your computer.
- Once ScanGear MF is open, you can access a wide range of scan settings to suit your specific requirements.
- Choose the desired color mode, such as color, black and white, or grayscale, depending on the nature of your document.
- Select the resolution that best suits your needs. Higher resolutions are ideal for capturing fine details, while lower resolutions can help reduce file size.
- Customize the file format for your scanned documents. Options may include PDF, JPEG, TIFF, or others.
- Save the scan settings, ensuring they are saved as your default preferences or specific presets for future use.
- Initiate the scan process, and ScanGear MF will apply your configured settings to capture the highest-quality scans.
By fine-tuning these advanced scan settings in ScanGear MF, you can achieve professional-grade results for various scanning needs. Whether you're archiving important documents, creating digital copies of photographs, or scanning images for artistic purposes, ScanGear MF gives you the flexibility and control to achieve the desired outcome.
If you need more detailed instructions or additional information on adjusting scan settings in ScanGear MF, please refer to the User's Guide or the Help section of the scanning software provided with your Canon machine.
Example of ScanGear MF Scan Settings
| Scan Setting | Description |
|---|---|
| Color Mode | Select the color mode that best represents your document: color, black and white, or grayscale. |
| Resolution | Choose the desired scanning resolution, ranging from standard to high-definition, for optimal image quality. |
| File Format | Select the file format for your scanned documents, such as PDF, JPEG, TIFF, or PNG, based on your needs. |
| Compression | If applicable, adjust the compression settings to balance file size and image quality. |
| Cropping | Use the cropping feature to remove unwanted borders or edges from the scanned document. |
Scanning Using an Application
Many applications, such as image-processing or word-processing software, support Canon scanning. By utilizing the scan functions within these applications, you can conveniently scan documents directly from the software interface. Follow these steps to effortlessly scan documents using a Canon application:
- Open the desired application on your computer.
- Select “ScanGear MF” as the scanner driver within the application settings. By choosing ScanGear MF, you can seamlessly integrate the Canon scanning capabilities into the application.
- Configure the scan settings according to your preferences. This includes selecting the desired scan type (color, black and white, or grayscale), adjusting the resolution, and specifying the file format.
- Follow the instructions provided by the application to start the scanning process. The scanning interface may vary depending on the application you are using, but it generally involves clicking a “Scan” or similar button.
- Once the scanning is complete, the application will prompt you to save the scanned documents to your computer. Select the desired location and save the scanned files accordingly.
Each application may have its own distinct scan functions and user interface. To explore the specific scanning capabilities of a particular application, refer to its Help section or user manual.
With the ability to scan documents directly from your favorite software applications, Canon makes it convenient to incorporate scanning into your workflow. Whether it's an image-processing program or a word-processing application, you can easily unleash the power of Canon scanning functions.
Potential Benefits of Scanning from Applications
When scanning from applications, you can leverage a range of features and benefits to enhance your document management. These advantages may include:
- Direct integration: Scanning from applications eliminates the need for additional software or manual file transfers. It streamlines the process by allowing you to initiate the scan directly within your preferred application.
- Enhanced customization: Applications often offer advanced scan settings, enabling you to tailor the scanning process to your specific requirements. You can adjust parameters such as resolution, color mode, and file format, ensuring optimal results.
- Seamless workflow: Scanning from applications promotes a seamless workflow as you can scan, edit, and save documents within the same software environment. It eliminates the need to switch between different programs, saving you time and effort.
- Immediate access to scanned documents: Upon completing the scan, the application immediately presents the scanned documents for further processing or editing. This instant access allows you to swiftly work with the scanned files without any delays.
By leveraging the scan functions provided within applications, you can maximize the efficiency and convenience of document scanning. Canon empowers you to seamlessly integrate scanning into your preferred software environment, ensuring a seamless and productive experience.
Scanning Tips and Tricks
Efficient scanning is essential for preserving the quality and integrity of your documents. Follow these tips and best practices to enhance your scanning experience with Canon devices:
Clean the Scanner Glass and Platen Regularly
Regular cleaning of the scanner glass and platen is crucial to ensure optimal scan quality. Dust, smudges, or debris can affect the clarity of your scans. Use a soft, lint-free cloth and a mild glass cleaner to gently clean these surfaces.
Choose the Appropriate Resolution
When scanning, selecting the correct resolution is essential. Higher resolutions produce larger file sizes but offer superior image quality. Consider your specific scanning needs and strike a balance between file size and image quality by choosing the appropriate resolution.
Organize Your Scanned Documents
Keep your scanned documents organized for easy retrieval. Create folders or subfolders with meaningful names to categorize and store your scans. This practice ensures efficient document management and saves time when searching for specific files.
Consider Optical Character Recognition (OCR)
OCR (Optical Character Recognition) technology converts scanned documents into searchable and editable text. If you frequently need to search for text within your scanned documents, consider utilizing OCR to extract and recognize the text content.
Experiment with Different Scan Modes
Explore different scan modes, such as color, black and white, or grayscale, to achieve the desired results for your specific scanning needs. Each mode offers unique characteristics that can enhance the visual representation of your documents.
Utilize Advanced Features and Settings
Make use of the advanced features and settings provided by Canon scanning software to gain better control over the scanning process. These features often include options for image adjustment, color correction, and file format customization.
Regularly Update Scanner Drivers and Software
Stay up to date with the latest scanner drivers and software updates. Canon regularly releases updates that may include new features, bug fixes, and improvements to optimize the performance of your scanner. Check the Canon website for the latest updates and install them as necessary.
By implementing these scanning tips and tricks, you can maximize scanning efficiency, improve document management, and achieve high-quality results with your Canon scanner.
Conclusion
Scanning and printing with Canon devices can be effortless and efficient when you follow the steps outlined in this guide. Whether you choose to use applications like My Image Garden or Quick Menu or directly scan from your Canon machine, the process is straightforward and user-friendly.
Maximize your scanning experience by taking advantage of the various scan settings and customization options. Tailor the scanning process to your specific needs, ensuring the best results for your documents.
Regular maintenance and staying up-to-date with software updates are crucial for achieving optimal performance from your Canon scanner or printer. By doing so, you can avoid any potential issues and ensure smooth operation.
With practice and familiarity, you can become a master of scanning and printing with Canon devices. Efficiently handle your documents, streamline your workflow, and enjoy the versatility and convenience offered by Canon products.
Source Links
- https://support.usa.canon.com/kb/index?page=content&id=ART135170
- https://support.usa.canon.com/kb/index?page=content&id=ART165710
- https://support.usa.canon.com/kb/index?page=content&id=ART166426

I'm Morgan, the creator of VPNForMe — a site born from too many hours spent side-eyeing sketchy VPN reviews and buffering videos.
I wanted a place where people could get straight answers about privacy, streaming access, and which VPNs actually deliver — without the hype or tech jargon.

